Musical raves are passe. Algoraves (or algorithmic raves) are the talk of the town right now. Armed with nothing but a Raspberry Pi and a set of speakers, a new breed of DJs is mixing music and churning out tunes with code. Their instrument? Sonic Pi.
Developed by Sam Aaron at the University of Cambridge, Sonic Pi was intended to be a tool for teaching programming to kids by combining computer code with music. But very much like the Raspberry Pi itself, it was found and adopted by a dedicated community of enthusiasts who put it to far more ambitious uses.
Today, Sonic Pi is a project supported by hundreds of Patreons across the globe and used by everyone from professional musicians to casual hobbyists. It remains a wonderful tool to learn programming in a non-boring, interactive manner, which is why it is used by educationists worldwide as well.
Follow us as we delve into the musical world of Sonic Pi, and you will be mixing beats and creating the next party anthem in no time!
Getting Started
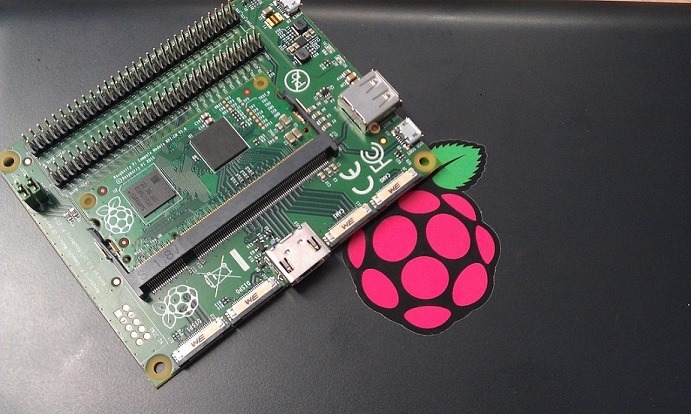
If you are using Raspbian stretch, you can skip this part – Sonic Pi comes pre-installed in the SD image of choice of the Raspberry Pi foundation. Even if that’s not the case, don’t fear. Since Sonic Pi is designed with the Raspberry in mind, installing it is as simple as downloading the package and running it. When connected to the Internet, simply enter:
<span style="color: #c20cb9; font-weight: bold;">sudo</span> <span style="color: #c20cb9; font-weight: bold;">apt-get install</span> sonic-piThe package and its dependencies would be downloaded and installed automatically. Hit “yes” when prompted to enable real time mode for “Jack,” and your Sonic Pi installation is ready to groove.
Running Sonic Pi
Sonic Pi needs a windowed environment to run. Just boot straight to X11 or type startx at the terminal prompt after logging in. You will find the Sonic Pi application in the Start menu.

Note: Sonic Pi does not require a Raspberry Pi to function; it can code music equally as well on a PC. Simply get a PC installation from the official website for both Windows and Mac, and you are ready to roll.
Time to Face the Music
Once the formalities are out of the way, let us get started on the real deal – making music via code. And the best thing about Sonic Pi? You can get started right away.
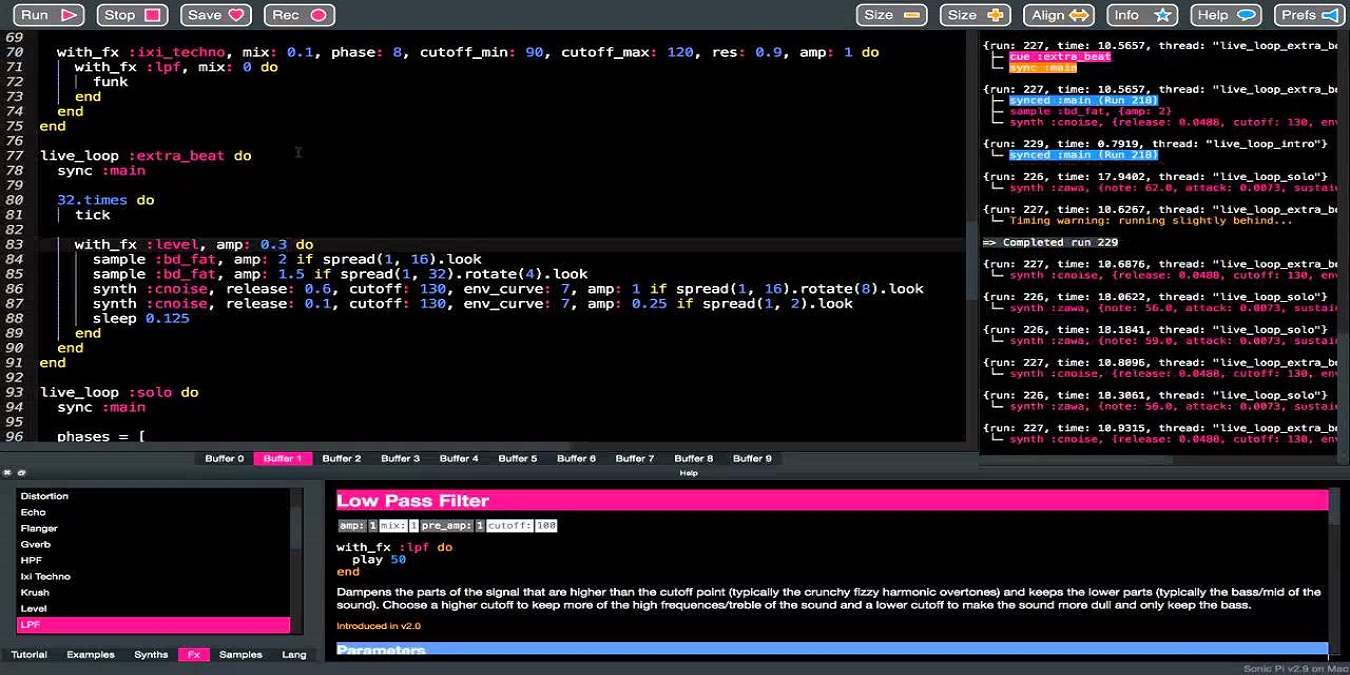
That’s right. There is no steep learning curve, no lengthy “initial” process, no boilerplate code; just start typing in and Sonic Pi will produce music for you. The interface is clean and intuitive (if you don’t think so, check out the image below to get your bearings.)
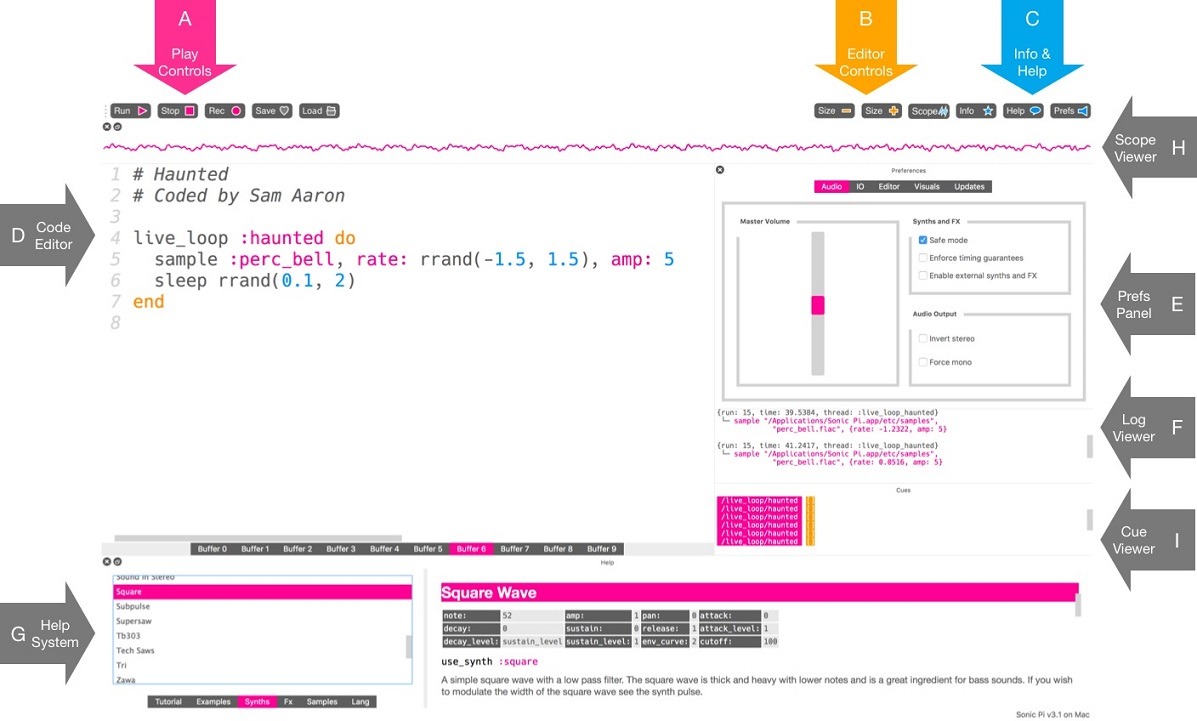
To begin with, lets keep it simple. Enter the following command:
sample <span style="color:#ff3333; font-weight:bold;">:ambi_lunar_land</span>Heard that? That’s a taste of what Sonic Pi can do. There are a wide variety of sounds that can triggered using the sample command, ranging from curious synths to recorded instruments. What is more, you can add samples of your own as well, such as that new tune you like humming, or even an entire song.
But if playing sounds were all that Sonic Pi were capable of, it wouldn’t be much of an audio tinkering system, would it? So let’s do something more. Enter the following code and hit the Play button.
live_loop <span style="color:#ff3333; font-weight:bold;">:flibble</span> <span style="color:#9966CC; font-weight:bold;">do</span><br /> sample <span style="color:#ff3333; font-weight:bold;">:bd_haus</span>, rate: <span style="color:#006666;">1</span><br /> <span style="color:#CC0066; font-weight:bold;">sleep</span> <span style="color:#006666;">0.5</span><br /><span style="color:#9966CC; font-weight:bold;">end</span>This time, the music repeats by itself, indefinitely till you hit Stop. This is accomplished with the live_loop statement; live loops are the heart and soul of Sonic Pi, and the primary tool in your musical arsenal. Live loops repeat a block of commands, and more importantly, update on every iteration.
That means that if you were to go back to the code and change the rate to “2”, the music would speed up immediately.
There are other parameters you can tweak as well. “amp” can be used to increase the loudness of a sample, “rate” to alter the duration, “release” to adjust fading effects, and many more besides.
Apart from adjusting the individual sounds produced, Sonic Pi also gives you a powerful timing and synchronization system. Want to play multiple tracks simultaneously in parallel? You can use threads. Want the sounds to trigger after specific intervals of time? There is the sleep command.
Whatever musical need you can think of (if you have ever used a DAW, you can probably think of quite a few), Sonic Pi can fulfill it for you. For a more detailed tutorial of using Sonic Pi, refer to the official walkthrough.
But the best thing about Sonic Pi is that you don’t need to know everything; you can just start experimenting with what you know live, as the music reflects your code. And who knows, maybe you might end up making some great tunes as well.
