You no longer need to spend hours trying to compile and run new software. Thanks to Docker, you can install and run contained applications with ease, pre-configured and ready for you to run.
This is perfect for software that might otherwise take time to set up, like a web server or cloud backup tool. Combine it with a Raspberry Pi, and you can set your new IoT project up in minutes.
Let’s explain how you can run Docker on a Raspberry Pi.
Installing Docker
Before you install Docker, we’ll assume you know how to set up a Raspberry Pi with a Linux-based operating system like Raspbian and that you’ve already done this.
For everyone that isn’t running the latest version of Raspbian (Raspbian Buster), or if you’re running a different Linux distribution, open a terminal window and run the following to begin installation:
curl <span style="color: #660033;">-sSL</span> https:<span style="color: #000000; font-weight: bold;">//</span>get.docker.com <span style="color: #000000; font-weight: bold;">|</span> <span style="color: #c20cb9; font-weight: bold;">sh</span>Unfortunately, for those who are using Raspbian Buster, you may run into trouble with installing via the script above. If that’s the case, run the following command instead to use the “nightly” versions of Docker:
curl <span style="color: #660033;">-fsSL</span> get.docker.com <span style="color: #000000; font-weight: bold;">|</span> <span style="color: #007800;">CHANNEL</span>=nightly <span style="color: #c20cb9; font-weight: bold;">sh</span>Be advised, however, that these versions may be unstable, so caution is advised.
Once that’s completed, and unless you’re running on the root user (which you shouldn’t really be doing!), type the following to give your user account access to the docker user group:
<span style="color: #c20cb9; font-weight: bold;">sudo</span> usermod <span style="color: #660033;">-aG</span> <span style="color: #c20cb9; font-weight: bold;">docker</span> piChange “pi” to your own username if you’ve changed from the default user.
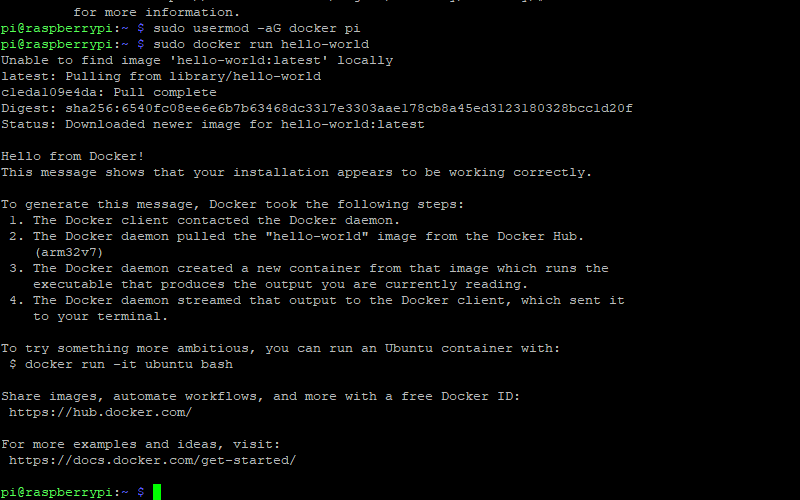
To check that Docker has installed correctly, type the following:
<span style="color: #c20cb9; font-weight: bold;">sudo</span> <span style="color: #c20cb9; font-weight: bold;">docker</span> run hello-worldThis will download and run a very simple “hello world” Docker container message in your terminal window. If you see a message like the one shown above, Docker should be ready to use.
You can also run sudo docker info to see a full and detailed list of your Docker configuration.
Finding and Installing Docker Containers
Once Docker is installed, installing Docker containers is your next step. Containers are the self-contained services you wish to run.
You can find many of the containers you might need on Docker Hub, the official Docker repository for container apps.
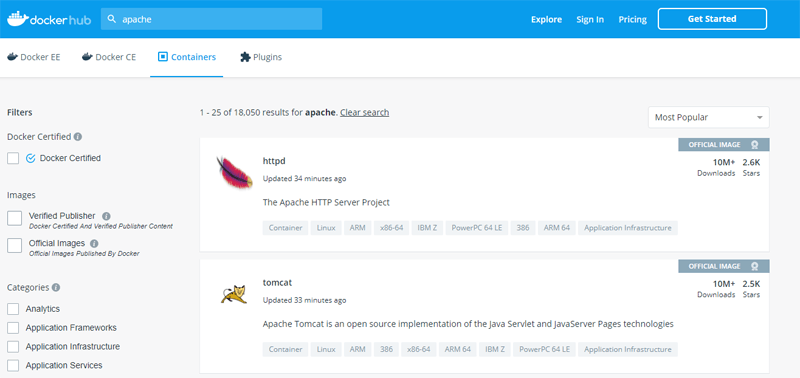
Some official software containers, like WordPress or PHP, are “Docker Official Images.” These are certified by Docker, meaning you can have the confidence to download and use them. Others are provided by third parties, so use some caution if you plan on using these for anything sensitive.
To install a container, locate the relevant package on Docker Hub and follow any provided instructions. Use the pull command to download the container. For example, if you wanted to download Apache to run your own Raspberry Pi web server, you’d need to type:
<span style="color: #c20cb9; font-weight: bold;">sudo</span> <span style="color: #c20cb9; font-weight: bold;">docker</span> pull httpdTo download and run Apache directly, you would type:
<span style="color: #c20cb9; font-weight: bold;">sudo</span> <span style="color: #c20cb9; font-weight: bold;">docker</span> run <span style="color: #660033;">-dit</span> <span style="color: #660033;">--name</span> my-test-apache-app <span style="color: #660033;">-p</span> <span style="color: #000000;">8080</span>:<span style="color: #000000;">80</span> <span style="color: #660033;">-v</span> <span style="color: #ff0000;">"<span style="color: #007800;">$PWD</span>"</span>:<span style="color: #000000; font-weight: bold;">/</span>usr<span style="color: #000000; font-weight: bold;">/</span>local<span style="color: #000000; font-weight: bold;">/</span>apache2<span style="color: #000000; font-weight: bold;">/</span>htdocs<span style="color: #000000; font-weight: bold;">/</span> httpd:<span style="color: #000000;">2.4</span>This would then download the relevant files before running Apache using a default configuration, accessible for you at http://your-pi-ip-address:8080.

You would probably want to create your own Dockerfile (Docker configuration file) if you were setting up a web server for production use, following the Apache Docker Hub guide.
Docker Makes IoT App Deployment Easy
Docker can take some time to get your head around if you’re creating your own containers, but it’s pretty easy to use pre-built containers, thanks to Docker Hub. Combine Docker with a Raspberry Pi (or several), and you can use containers to quickly deploy new software. This is great for the IoT space, where you might have several devices needing the same software, with the same configuration.
There are plenty of reasons why Docker and IoT go together, so let us know what you plan on using Docker for. Do you want to run a web server, or are you going to create your own home automation system? Let us know in the comments below.
