The Raspberry Pi is a versatile and relatively inexpensive single-board computer that you can use in a range of projects. However, if you really want to take your Raspberry Pi projects to the next level, you may want to build a Raspberry Pi cluster. This is where the Turing Pi v1 can come in handy. It allows you to easily connect multiple Raspberry Pis together to form a cluster.
What is the Turing Pi?
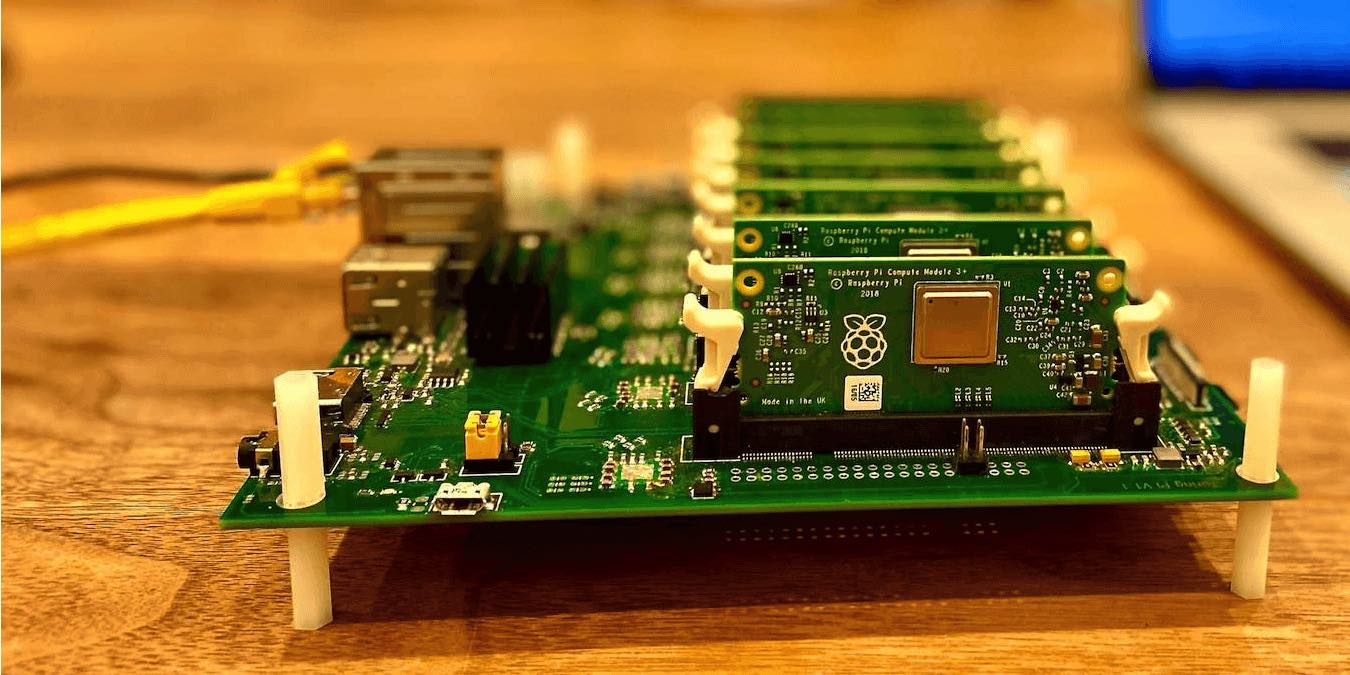
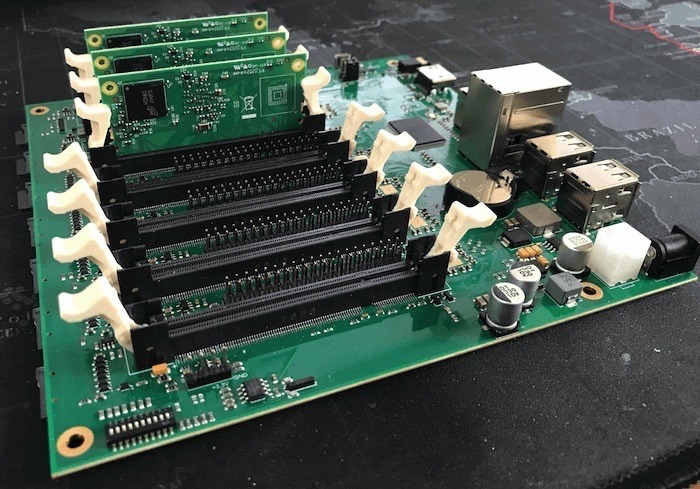
The Turing Pi is a plug-and-play Raspberry Pi cluster with space for seven Raspberry Pi Compute Modules. It’s small enough to sit on your desk.

One good thing about the Turing Pi is that it builds the power distribution and networking directly into the main board. This means you can set up a cluster without having to purchase multiple network and micro USB cables or a USB multi-port power supply. The Turing Pi also has a built-in gigabit network backplane, so you don’t have to purchase a separate network switch.
If you want a case for your cluster, the Turing Pi would fit any Mini ITX case. Just note that the Turing Pi doesn’t have a fan connector. This may become an issue if you install the Turing Pi in an enclosure that requires active cooling. There’s also no easy way to integrate the Turing Pi with a mini ITX case’s buttons and status lights, which may become an issue if you want to use a case.
What can I do with the Turing Pi?
When you use a Turing Pi, each Compute Module gets its own 40-pin GPIO header, which allows you to run multiple projects simultaneously. This makes the Turing Pi a great base for a home server, for example, if you wanted to host Minecraft, Plex, Owncloud, or Nextcloud. You could also use your Turing Pi cluster to host Edge applications or Internet of Things (IoT) applications.
Turing Pi supports the Kubernetes software ecosystem, as well as machine learning and serverless stacks. This means you could use Turing Pi to develop and learn cloud-native technologies, including Kubernetes, Docker Swarm, Serverless, and Microservices. You could also use it to learn the concepts of distributed Machine Learning applications, cluster applications, parallel computing, and distributed computing. The possibilities are nearly endless.
Adding Compute Modules to the Turing Pi
Since the Turing Pi uses DDR2 SODIMM slots for the Compute Module, it’s compatible with Raspberry Pi Compute Module 1, Compute Module 3, and Raspberry Pi Compute Module 3+. The Turing Pi also has a microSD card slot for each Compute Module.
You can use any compatible Compute Module with your Turing Pi, although I’d recommend purchasing Modules with built-in eMMC (embedded Multi-Media Controller) memory. This allows you to boost your Compute Module without an external microSD card.
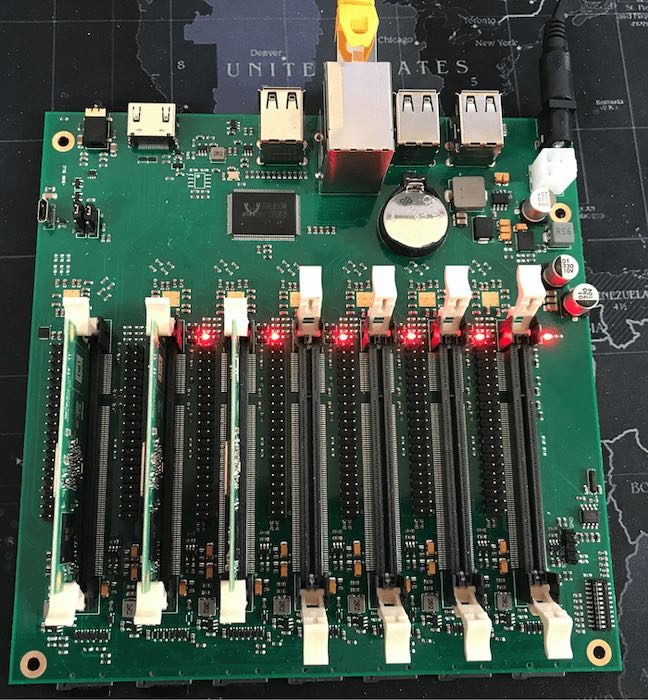
The Turing Pi’s “master” node is in Slot 1, which has a full-size HDMI port and two USB 2.0 ports. This makes it possible to control the entire cluster via Slot 1, with no additional Compute Modules required.
Turing Pi has space for up to seven nodes, although you don’t have to insert a Compute Module into every slot in order to use your Turing Pi. You can start with a couple of nodes and then scale as needed.

You can even scale while your cluster is running. Unmounting multiple Compute Modules can be a time-consuming and frustrating process. Fortunately, Turing Pi supports hot-swapping the Compute Modules, so you’re free to add and remove Modules, without having to power down your cluster.
How to power your Turing Pi
There are two ways to power the board. You can either use a standard 12V power supply, or a 4-pin ATX power connector. This flexibility means you may already have everything you need to power your Turing Pi.
When it comes to boot options, each of the seven slots has a microSD card attached, and four have dedicated USB ports (the first, second, fourth, and sixth slots). Since the Compute Module supports eMMC storage, this gives you three different ways to boot.
You can also boot over the network. For example, you could have one Compute Module run a NAS and boot all the other nodes in your cluster.
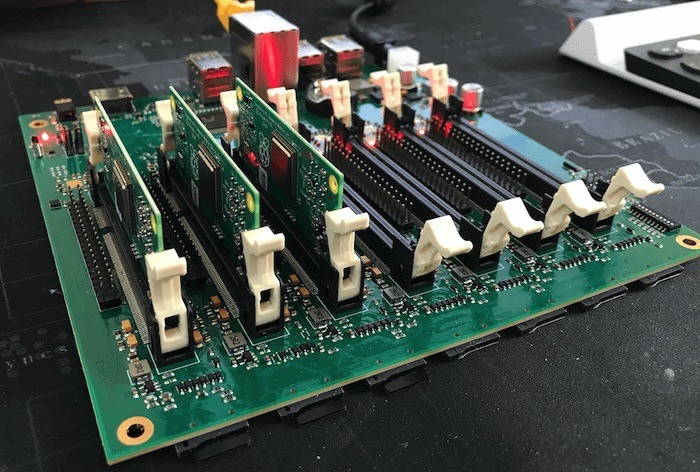
However, this is where I encountered my first major problem with the Turing Pi: the board itself doesn’t feature many labels or markings. This meant that I initially inserted the Compute Module into Slot 1 incorrectly – and nothing appeared on my external monitor as a result.
To add to the confusion, all the LEDs on the slots light up, regardless of whether the Turing Pi has made a connection with the associated Compute Module. Initially, I assumed that Slot 1 was set up correctly because the LED was illuminated. This made it difficult to figure out what was wrong, especially since the Turing Pi doesn’t come with any instructions.

Even the Turing Pi’s website wasn’t particularly helpful for clearing up this confusion. The website assumes a high level of technical knowledge, and I struggled to find any information covering the basics, such as an explanation of the board’s various pins and slots. In the end, I had to resort to third-party tutorials for help.
After switching my Compute Modules around a few times, I did manage to insert the Compute Module into Slot 1 correctly. However, the gaps in the Turing Pi’s documentation, and the strange decision to illuminate all the LEDs regardless of whether the slots are set up correctly, made it significantly more difficult to get my cluster up and running.
Performance: does CM3+ hold the Turing Pi back?
When it comes to performance, the Turing Pi enables your Compute Modules to perform at their fullest capacity. However, the Turing Pi is ultimately constrained by the older system-on-a-chip that the Compute Module 3+ (CM3+) uses. For example, the Compute Module is clocked at a maximum of 1.2 GHz, and the USB and network connections are constrained by the fact that the Compute Module’s system-on-a-chip shares a bus for those connections.
If you’re looking for a high-performing cluster, then the Raspberry Pi 4 does have the edge over a Turing Pi running multiple Compute Modules.
This was the second major issue I encountered with the Turing Pi. Canonical has just released a new version of Kubernetes (MicroK8s) that comes with autonomous high availability clustering. This enables Kubernetes to automatically move your deployed applications from cluster to cluster in the event of failure.
I had planned to deploy MicroK8s on the Turing Pi to see how well it ran this latest version. However, the CM3+ modules only offer 1GB of RAM. During testing, I realized that while it was possible to deploy MicroK8s on the Turing Pi using CM3+, cluster performance was so slow that I was unable to successfully deploy any packages.
Although this is due to limitations with CM3+ rather than the board, this does impact the kind of projects you can run on the Turing Pi. It’s worth noting that Turing Pi seems to be aware that modern clustering tasks are rapidly outpacing CM3+, as they recently announced Turing Pi 2, which supports the Raspberry Pi 4 Compute Module (CM4).
Depending on how you plan to use your cluster, it may be worth splashing out on the Turing Pi 2, especially as clustering becomes more advanced and resource-hungry.
Plan B: creating a Docker Swarm with HypriotOS
It’s difficult to properly review a product like the Turing Pi without setting up a fully-functioning cluster. With CM3+ unable to properly support MicroK8s, I decided to fall back on Docker Swarm.
The Turing Pi had no issues running Docker Swarm. The board itself performed well throughout the test, and even without a fan, I had no issues with thermal throttling.
What’s the verdict?
Priced at $189, the Turing Pi is one of the more expensive cluster boards on the market. However, it’s a compact device that provides pretty much everything you need to break into the world of Raspberry Pi clusters.
With some extra labeling and documentation, this has the potential to be a useful tool for anyone who’s looking to lose a few weekends experimenting with the ins and outs of clustering.
This is a pretty niche product, especially considering the price, but after some initial frustrations with the LEDs and lack of documentation, my cluster has been up and running without any issues.
Will you be purchasing a Turing Pi? Or perhaps you’re holding out for the Turning Pi 2? Share your thoughts, in the comments below!