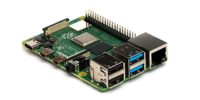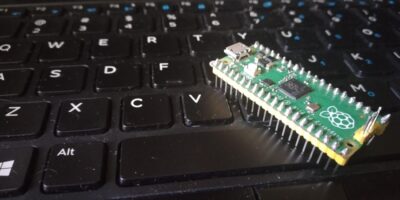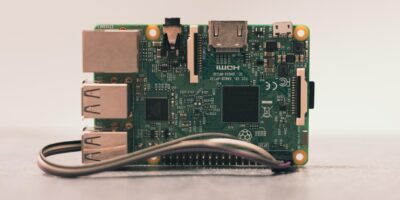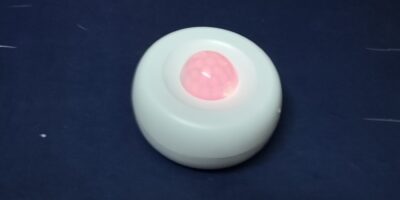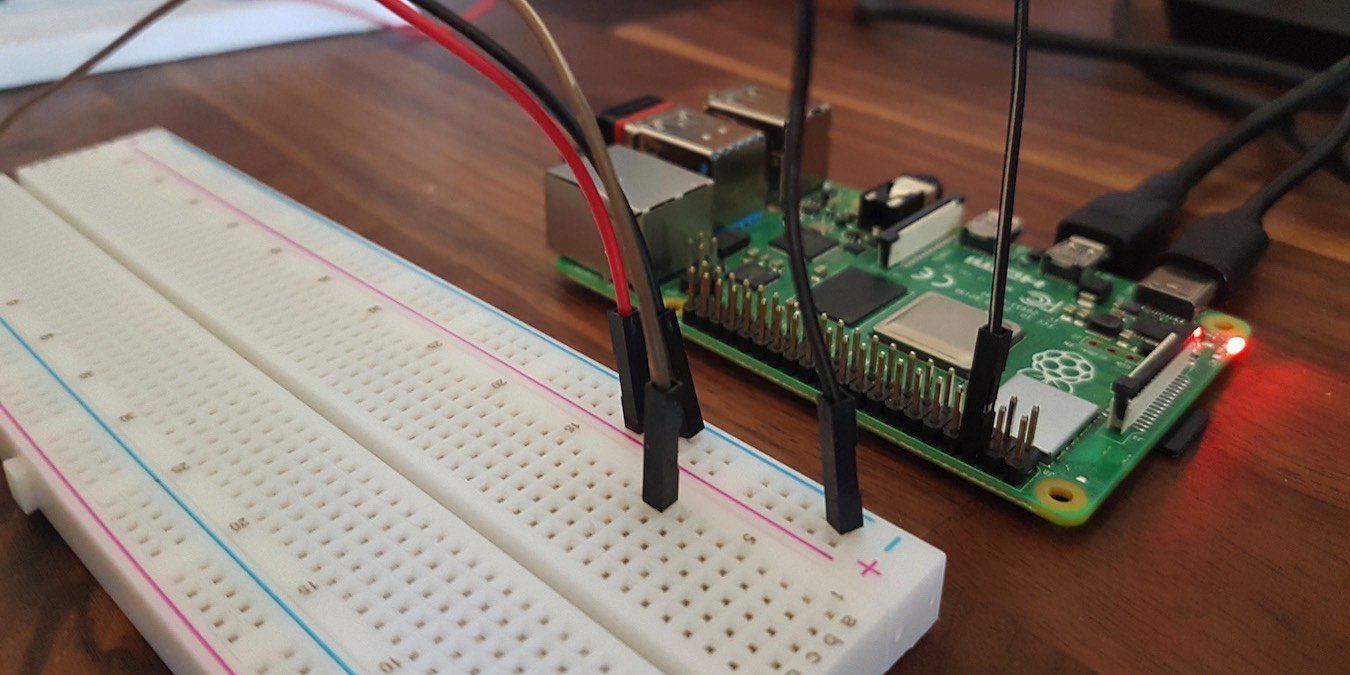
Out of the box, the Raspberry Pi is a powerful and versatile single-board computer you can use for countless IoT (Internet of things) projects. You can also extend your Raspberry Pi with sensors, modules, motors, displays and other components, making it even more powerful. Here we will show you how to build a Raspberry Pi motion sensor.
By the end of this tutorial, you will have learned to attach a PIR sensor to your Raspberry Pi and code a simple program that processes input from this PIR sensor. Your Raspberry Pi will be able to detect whenever someone enters or leaves the room.
What is a PIR Sensor?
Every object that has a temperature emits a small amount of infrared (IR), and a PIR sensor detects movement by monitoring these IR levels.
When the PIR sensor is in an idle state, it detects the area’s ambient IR level. When something moves in front of the sensor, the PIR detects a positive differential change in IR levels. You’ll know that a person, animal or an animate object has entered the sensing area. When the person or object leaves the sensing area, the PIR sensor detects a negative differential change.
You can detect movement by creating a program or installing software that monitors these fluctuations in IR levels.
What you’ll need
To complete this tutorial, you’ll need the following:
- Raspberry Pi that’s running Raspbian. If you don’t already have Raspbian, you can grab the latest version and flash it using Etcher.
- Power cable that’s compatible with your Raspberry Pi
- External keyboard and a way to attach it to your Raspberry Pi
- HDMI or micro HDMI cable, depending on your model of Raspberry Pi
- External monitor
- Solderless breadboard, to organize all the components in the circuit
- Six male-to-female jumper wires: two red, two black, one brown, and one orange
- PIR Sensor that’s compatible with Raspberry Pi
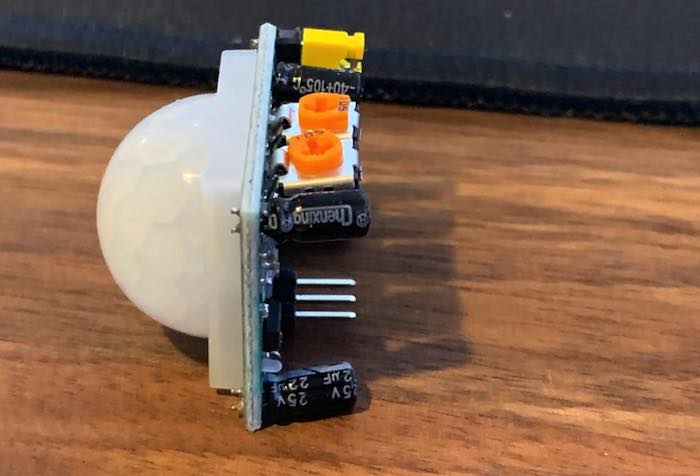
Once you have your kit, you’re ready to assemble your circuit!
Build your circuit
The first step is to assemble the circuit.
Attach the jumper wires to your PIR sensor
To start, you’ll need three male-to-female jumper wires in the following colors: red, brown, and black.
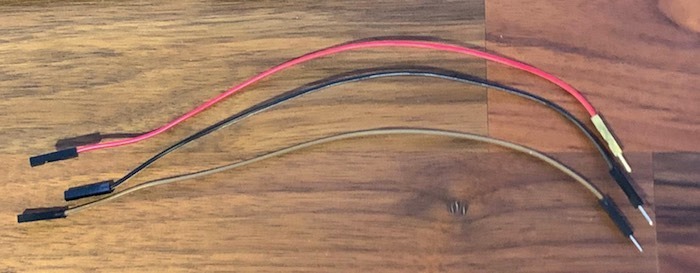
You need to attach each of these jumper wires to a different pin on the PIR sensor:
- Red. Attach this wire to PIR-VCC (3-5VDC in)
- Brown. Attach this wire to PIR-OUT (digital out)
- Black. Attach this write to PIR-GND (ground).
Attach the jumper wires to your breadboard
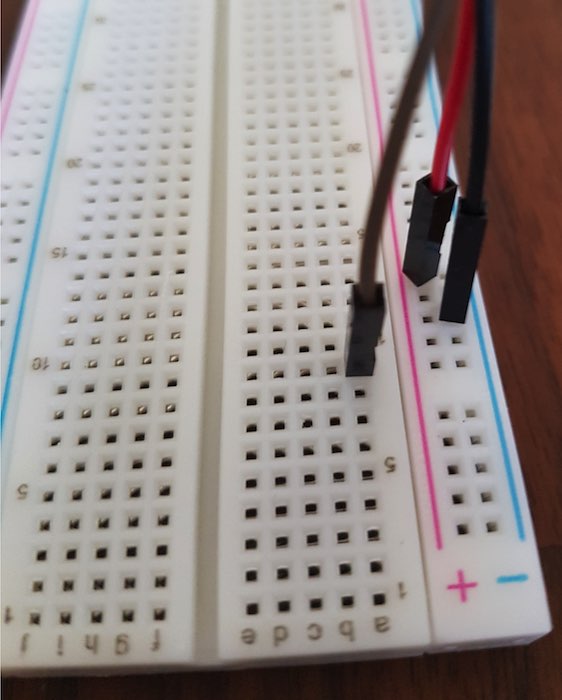
Now, grab your breadboard. The positive and negative signs on both sides of the breadboard indicate the positive and negative rails.
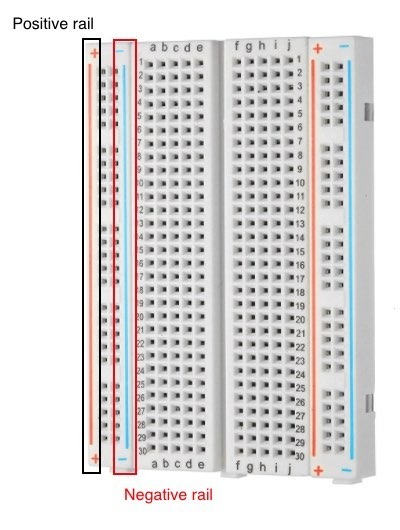
You need to attach the jumper wires to the following rails:
- Red (PIR-VCC). Attach this to the positive rail.
- Black (PIR-GND). Attach this to the negative rail.
- Brown (PIR-OUT). Attach this to any other blank rail.
Attach your Raspberry Pi to the breadboard
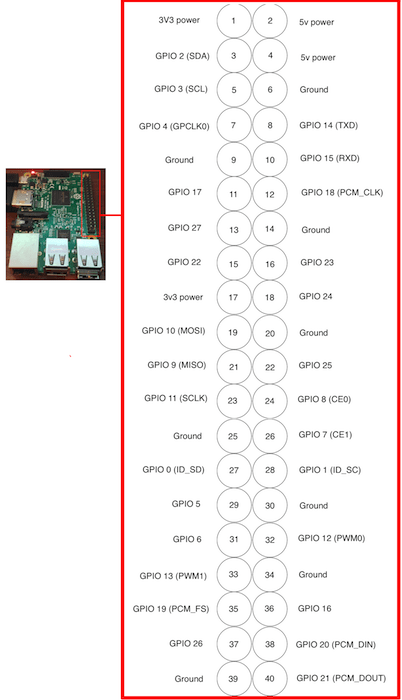
Now, grab the three remaining jumper wires in your kit: red, black and orange. These wires will be used to connect the Raspberry Pi to the breadboard. Specifically, you’ll be working with the following GPIO pins on the Raspberry Pi:
- GPIO GND [Pin 6]
- GPIO 5V [Pin 2]
- GPIO 7 [Pin 26]
You can see these pins marked in the following diagram.
Attach each of these pins to the breadboard using the male-to-female jumper wires:
- Black. Attach this to the GPIO GND [Pin 6], then attach this wire to the negative rail of your breadboard.
- Red. Attach this wire to the GPIO 5V [Pin 2], then attach this wire to the positive rail of your breadboard.
- Orange. Attach this wire to GPIO 7 [Pin 26]. You’ll use this wire to monitor when the PIR detects motion, so make sure you connect this wire to the same rail as PIR-OUT (the brown jumper wire).
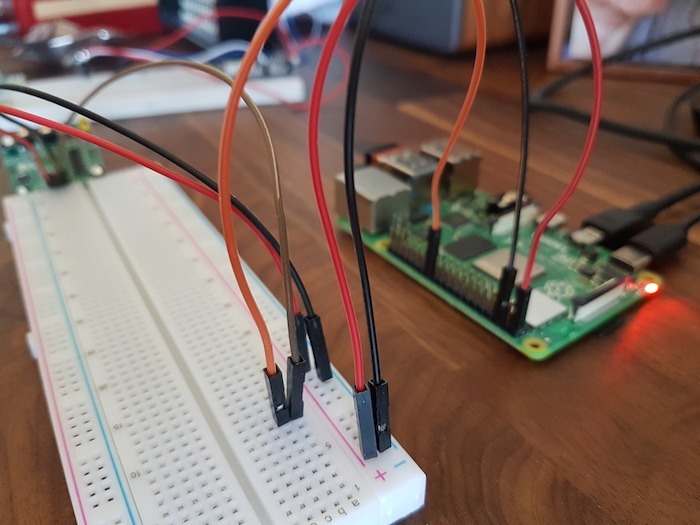
And that’s it! You’ve assembled your circuit, and your PIR sensor will now report fluctuations in IR to the Raspberry Pi. The next step is to write a program that’s capable of processing this data.
Set up your Raspberry Pi
Make sure all the peripherals are attached to your Raspberry Pi, such as the keyboard, monitor and Ethernet cable, if you’re not connecting over Wi-Fi. Finally, attach the power cable and boot your Raspberry PI.
If this is your first time booting Raspbian, then follow the setup instructions and make sure you’re connected to the Internet.
Before the Python script can be created, you need to install the RPi.GPIO module, as this will allow you to control the Raspberry Pi’s GPIO pins.
To install RPi.GPIO, open a Terminal window by clicking the “Terminal” icon in the Raspbian toolbar and then running the following command:
<span style="color: #c20cb9; font-weight: bold;">sudo</span> <span style="color: #c20cb9; font-weight: bold;">apt-get install</span> python-rpi.gpioRaspberry Pi will now download and install the RPi.GPIO package.
Creating a program in Thonny Python
Next, write the Python script that’ll process all the information you receive from the PIR sensor.
Create this script in Thonny Python, as this IDE (Integrated Development Environment) comes bundled with Raspbian.
1. Select the Raspberry Pi icon in the toolbar.
2. Navigate to “Programming -> Thonny Python IDE.”
3. Select “New.”
Note: This tutorial goes through the script line by line so you can see exactly what’s happening in each section of code. However, if you just want to copy/paste the script, you can find the completed script toward the end of the tutorial
4. The fist step is importing the Python GPIO library:
<span style="color: #ff7700;font-weight:bold;">import</span> RPi.<span style="color: black;">GPIO</span> <span style="color: #ff7700;font-weight:bold;">as</span> GPIOA few delays are used throughout the code, so import the “time” library:
<span style="color: #ff7700;font-weight:bold;">import</span> <span style="color: #dc143c;">time</span>When you’re working with RPi.GPIO, you can refer to each pin using either its pin number (BOARD) or Broadcom GPIO number (BCM). While both approaches are correct, you have to be sure to use the same numbering system throughout your program. This tutorial uses BCM, so set the GPIO numbering mode to BCM:
GPIO.<span style="color: black;">setmode</span><span style="color: black;">(</span>GPIO.<span style="color: black;">BCM</span><span style="color: black;">)</span>The input pin will be referenced throughout the script, so this pin needs a name. The tutorial is using PIR_PIN:
PIR_PIN <span style="color: #66cc66;">=</span> <span style="color: #ff4500;">7</span>Next, clarify that PIR_PIN is an input pin:
GPIO.<span style="color: black;">setup</span><span style="color: black;">(</span>PIR_PIN<span style="color: #66cc66;">,</span> GPIO.<span style="color: black;">IN</span><span style="color: black;">)</span>Next, you’ll create the message that will be printed to Thonny Python’s console (also known as the Shell), so you can see that the circuit is online and ready to detect movement.
In the following snippet, a two-second delay is added between the first part of the message and the second:
<span style="color: #ff7700;font-weight:bold;">try</span>:<br /> <span style="color: #ff7700;font-weight:bold;">print</span> <span style="color: black;">(</span><span style="color: #483d8b;">"PIR Module Test"</span><span style="color: black;">)</span><br /> <span style="color: #dc143c;">time</span>.<span style="color: black;">sleep</span><span style="color: black;">(</span><span style="color: #ff4500;">2</span><span style="color: black;">)</span><br /> <span style="color: #ff7700;font-weight:bold;">print</span> <span style="color: black;">(</span><span style="color: #483d8b;">"Ready"</span><span style="color: black;">)</span>To have the program continuously check the input from the PIR sensor, use a “True” statement to create an infinite loop. Every time movement is detected, you want the script to print a message to the Thonny Python console. To ensure you only receive one output when movement is detected, add a one-second delay:
<span style="color: #ff7700;font-weight:bold;">while</span> <span style="color: #008000;">True</span>:<br /> <span style="color: #ff7700;font-weight:bold;">if</span> GPIO.<span style="color: #008000;">input</span><span style="color: black;">(</span>PIR_PIN<span style="color: black;">)</span>:<br /> <span style="color: #ff7700;font-weight:bold;">print</span> <span style="color: black;">(</span><span style="color: #483d8b;">"Movement detected"</span><span style="color: black;">)</span><br /> <span style="color: #dc143c;">time</span>.<span style="color: black;">sleep</span><span style="color: black;">(</span><span style="color: #ff4500;">1</span><span style="color: black;">)</span>Finally, make sure the program exits cleanly:
<span style="color: #ff7700;font-weight:bold;">except</span> <span style="color: #008000;">KeyboardInterrupt</span>:<br /> <span style="color: #ff7700;font-weight:bold;">print</span> <span style="color: black;">(</span><span style="color: #483d8b;">"Quit"</span><span style="color: black;">)</span><br />GPIO.<span style="color: black;">cleanup</span><span style="color: black;">(</span><span style="color: black;">)</span>Save your changes by clicking the “Save” button.
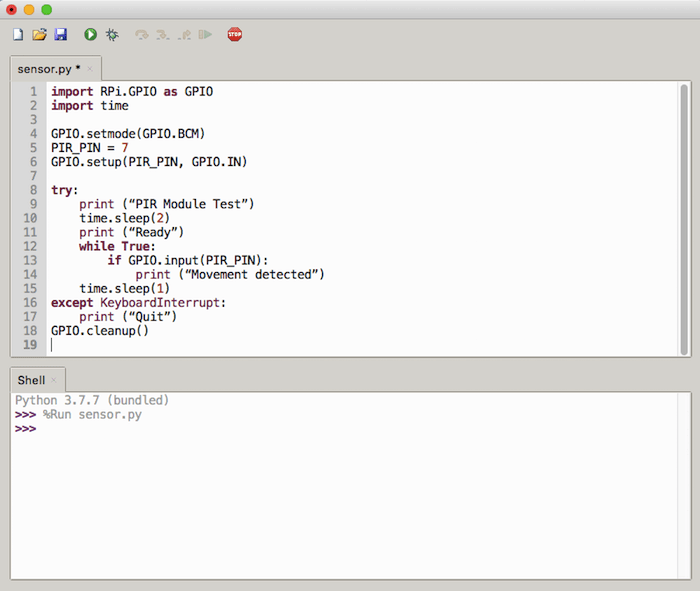
And that’s it! You’ve just created a script that monitors the PIR sensor and performs a task every time movement is detected. In this instance, that’s printing a message to the Thonny Python console.
Complete motion detection script for Raspberry Pi
Want to copy/paste the code straight into Thonny Python? Here’s the completed script:
<span style="color: #ff7700;font-weight:bold;">import</span> RPi.<span style="color: black;">GPIO</span> <span style="color: #ff7700;font-weight:bold;">as</span> GPIO<br /><span style="color: #ff7700;font-weight:bold;">import</span> <span style="color: #dc143c;">time</span><br /><br />GPIO.<span style="color: black;">setmode</span><span style="color: black;">(</span>GPIO.<span style="color: black;">BCM</span><span style="color: black;">)</span><br />PIR_PIN <span style="color: #66cc66;">=</span> <span style="color: #ff4500;">7</span><br />GPIO.<span style="color: black;">setup</span><span style="color: black;">(</span>PIR_PIN<span style="color: #66cc66;">,</span> GPIO.<span style="color: black;">IN</span><span style="color: black;">)</span><br /><br /><span style="color: #ff7700;font-weight:bold;">try</span>:<br /> <span style="color: #ff7700;font-weight:bold;">print</span> <span style="color: black;">(</span><span style="color: #483d8b;">"PIR Module Test"</span><span style="color: black;">)</span><br /> <span style="color: #dc143c;">time</span>.<span style="color: black;">sleep</span><span style="color: black;">(</span><span style="color: #ff4500;">2</span><span style="color: black;">)</span><br /> <span style="color: #ff7700;font-weight:bold;">print</span> <span style="color: black;">(</span><span style="color: #483d8b;">"Ready"</span><span style="color: black;">)</span><br /> <span style="color: #ff7700;font-weight:bold;">while</span> <span style="color: #008000;">True</span>:<br /> <span style="color: #ff7700;font-weight:bold;">if</span> GPIO.<span style="color: #008000;">input</span><span style="color: black;">(</span>PIR_PIN<span style="color: black;">)</span>:<br /> <span style="color: #ff7700;font-weight:bold;">print</span> <span style="color: black;">(</span><span style="color: #483d8b;">"Movement detected"</span><span style="color: black;">)</span><br /> <span style="color: #dc143c;">time</span>.<span style="color: black;">sleep</span><span style="color: black;">(</span><span style="color: #ff4500;">1</span><span style="color: black;">)</span><br /><span style="color: #ff7700;font-weight:bold;">except</span> <span style="color: #008000;">KeyboardInterrupt</span>:<br /> <span style="color: #ff7700;font-weight:bold;">print</span> <span style="color: black;">(</span><span style="color: #483d8b;">"Quit"</span><span style="color: black;">)</span><br />GPIO.<span style="color: black;">cleanup</span><span style="color: black;">(</span><span style="color: black;">)</span>Don’t forget to hit “Save!”
Testing your PIR motion detector
Now that you’ve saved your script, it’s time to put it to the test by clicking the “Run” button.
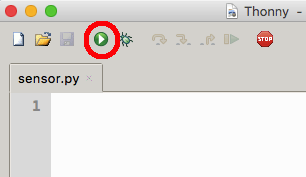
After a few moments, your program should print the “PIR Module Test / Ready” message.
Knowing the sensor is online, check that it’s responding to movement by deliberately triggering the PIR sensor. Wave your hand in front of the sensor, and “Movement detected” should appear in the Thonny Python console.
Thanks to the infinite “True” loop, the program will run indefinitely, so you’ll need to stop it manually by clicking the “Stop” button.
Congratulations, you’ve now successfully transformed your Raspberry Pi into a motion sensor!
Wrapping Up
Your Raspberry Pi can now detect movement and perform a task every time movement is detected. This is the perfect foundation for a wide range of IoT and smart home projects! Using this as the base, you can also replace your PIR sensor with other simple components, such as a camera, buzzers and switches. You can also use it for another IoT project.

