Once you’ve set up your SmartThings network, you can monitor and control every part of your smart home from the SmartThings mobile app. But what about controlling your smart home from your laptop? You’ll learn here how to control your smart home from your Mac when you add a SmartThings drop-down menu to the macOS menu bar. With this menu in place, you can monitor and control the full range of SmartThings sensors, run routines and switch between different SmartThings modes, directly from your laptop.
What is ST BitBar V2?
This tutorial will use the ST BitBar V2 smart application to add a SmartThings menu to a Mac.
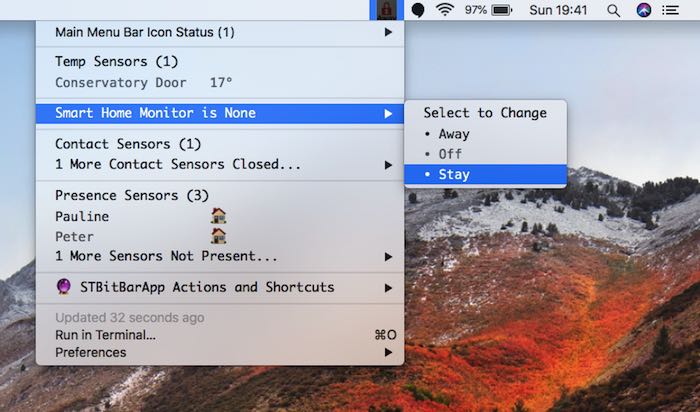
The ST BitBar V2 menu can display a range of data, including temperature, humidity and light levels, plus the status of any presence sensors, locks or smart bulbs that are connected to your network.
You can also use this menu to control your smart devices. For example, cranking up your smart thermostat, turning on lights, or activating locks throughout your smart property. Finally, you can view your network’s current mode, switch between modes, and trigger routines, all with just a click of the mouse.
Installing BitBar
The ST BitBar V2 project consists of three parts:
- BitBar. This macOS application allows you to customize macOS’s menu bar by adding the output of any script to the Mac menu bar.
- ST Plugin. This is a collection of files you’ll download from GitHub and place within the BitBar plugin directory.
- BitBar Output. This is a Samsung smart app that you’ll install from code. Installing an app from Groovy code may sound time-consuming, but since the code has already been written, you’ll just need to copy/paste it into the SmartThings IDE, which is accessible via your web browser.
Let’s start by installing BitBar for macOS:
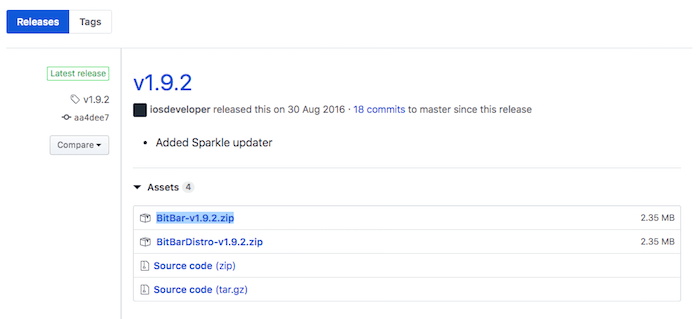
1. On your Mac, head over to the BitBar GitHub page and download the latest release. There are several files available, so make sure you download “BitBar-v(version-number).zip” – for example, BitBar-v1.9.2.zip.
2. Once BitBar has finished downloading, launch it and follow the onscreen instructions to install.
3. Launch the application. When prompted, select a folder where you want to place your ST plugin files and then select “Use as plugin directory.”
4. When prompted, move BitBar to your Mac’s “Applications” folder.
5. Launch the BitBar app; a new icon should appear in your Mac’s menu bar.
6. Give the BitBar icon a click and select “Open at Login.”
How to download software from GitHub
Next, download the BitBar Plugin section of STBitBarApp V2’s GitHub repository. Essentially, you just need the folder pictured below.
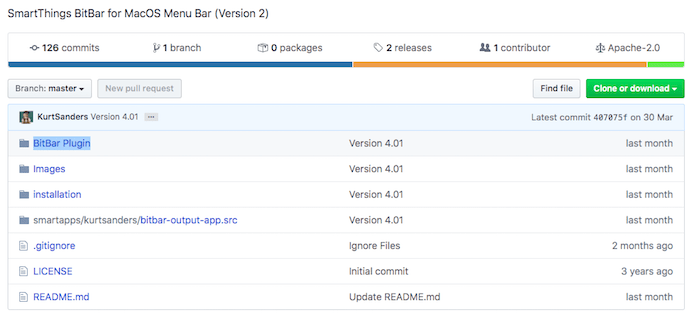
Head to STBitBarApp V2’s page and click the “Clone or download -> Download ZIP” button.
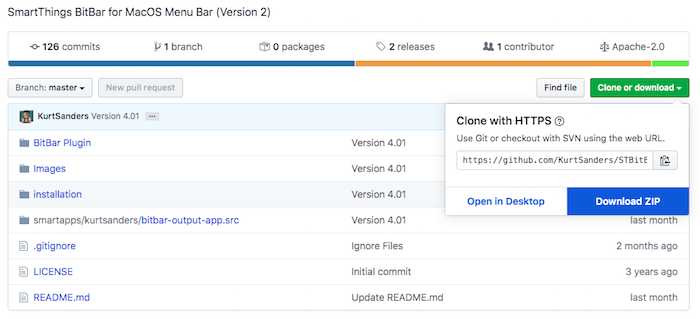
Unzip it, find the “BitBar Plugin” folder, and drag it to a location that’s easily accessible, such as your Desktop. You can now delete the rest of the “STBitBarApp-V2” folder.
Adding BitBar plugin to your plugin directory
Once you have the “BitBar Plugin” folder on your computer, unzip and open the plugin folder. It should contain an “ST” folder and a “ST.1m.sh” file.
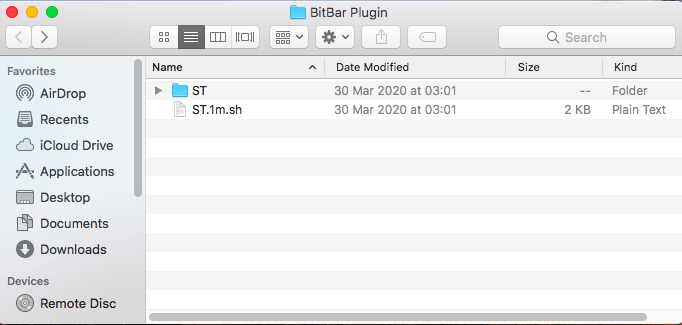
In a new Finder window, navigate to the folder that you set up as BitBar’s plugin directory in the previous step. Drag both the “ST” folder and the “ST.1m.sh” file into the plugin directory.
Add BitBar Output to your SmartThings app
Next, build the BitBar Output smart application:
1. On your Mac, copy the BitBar Output code.
2. Log in to the SmartThings IDE using either your Samsung account or your SmartThings account.
3. Select “My Locations” and then your smart home hub.
4. In the toolbar, select “My SmartApps.”
5. Select “New SmartApp -> From Code.”
6. Paste your code into the subsequent window.
7. Select “Create -> Update.”
8. Click “Publish -> For Me.”
9. Select “App Settings.”
10. Click to expand the “OAuth” section and then select “Enable OAuth in SmartApp.”
That it’s! You can now access the BitBar Output application via your SmartThings mobile app.
Installing the BitBar Output SmartApp
On your smartphone or tablet:
1. Launch the SmartThings mobile app.
2. In the bar that runs along the bottom of the screen, tap “Automation.”
3. Tap the “SmartApps” tab.
4. Select “Add a SmartApp > My Apps.”
5. Select “BitBar Output App.”
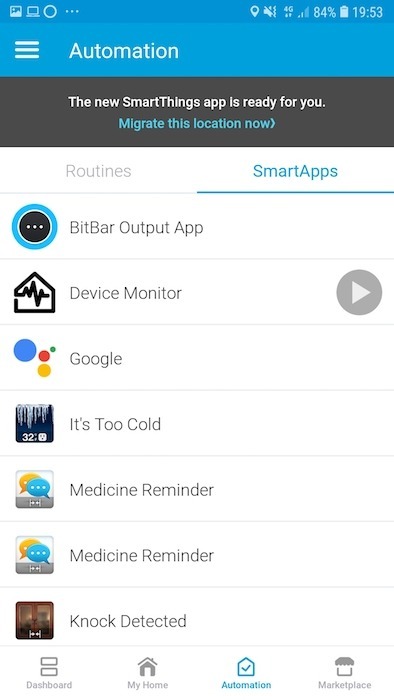
6. Tap “Please complete API setup > Enable API > Save.”
SmartThings will now display a URL and API that you’ll need to share with the ST Plugin in order to create a connection between the various STBitBarApp V2 components.
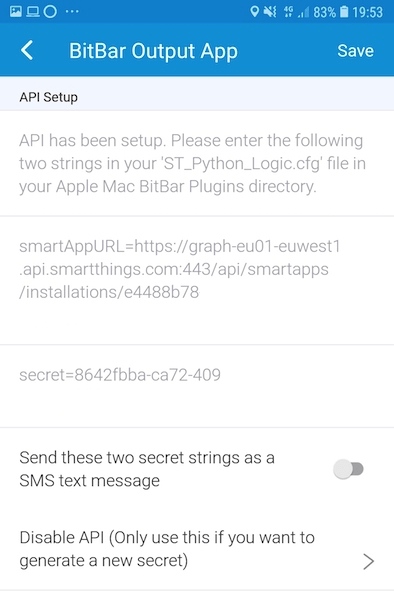
Make a note of the URL and API values before moving on to the next step.
Connecting BitBar: Add your URL and API secret
You will need to switch back to your Mac:
1. Navigate to the folder that you set up as your plugin directory.
2. Open the “BitBar Plugin -> ST” folder. The “ST” folder should contain a “ST_Python_Logic.cfg” file.
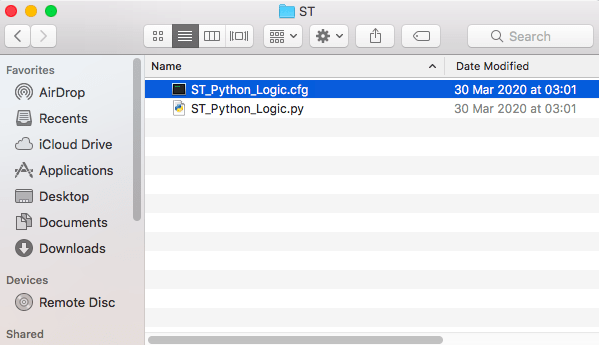
3. Control-click “ST_Python_Logic.cfg” and open it in your Mac’s TextEdit app.
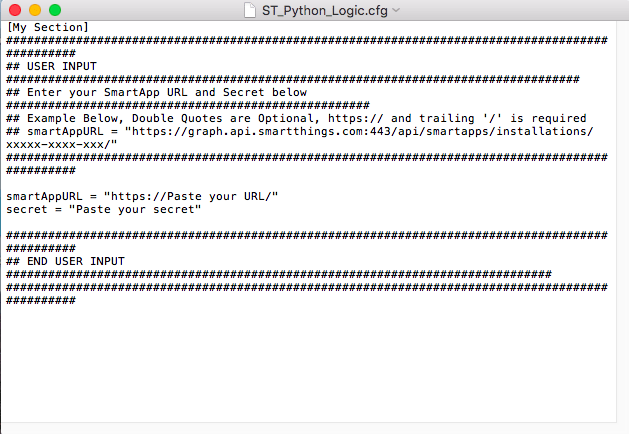
4. Find the following line:
smartAppURL = <span style="color: #ff0000;">"https://Paste your URL/"</span>Replace the placeholder value with the URL generated by the SmartThings Classic application. It will look something like this:
smartAppURL = <span style="color: #ff0000;">"https://graph-eu01-euwest1.api.smartthings.com:443/api/smartapps/installations/e4488b”</span>Next, find the “Secret” line:
secret = <span style="color: #ff0000;">"Paste your secret"</span>Add the API that SmartThings generated in the previous step. For example:
secret = 8642fbba-ca72-<span style="color: #000000;">4096</span>-96e6Save your changes, by selecting “File -> Save.”
Make ST.1m.sh and ST_Python_Logic executable
Next, make the files within the “BitBar Plugin” folder executable:
1. Launch your Mac’s Terminal application.
2. Switch to the folder that contains your ST.1m.sh file:
<span style="color: #7a0874; font-weight: bold;">cd</span> <span style="color: #000000; font-weight: bold;">/</span>Applications<span style="color: #000000; font-weight: bold;">/</span>ST3. Make the file executable:
<span style="color: #c20cb9; font-weight: bold;">chmod</span> +x ST.1m.sh4. Change the directory again so that the Terminal is pointing at the location of your ST_Python_Logic.py file:
<span style="color: #7a0874; font-weight: bold;">cd</span> <span style="color: #000000; font-weight: bold;">/</span>Applications<span style="color: #000000; font-weight: bold;">/</span>ST<span style="color: #000000; font-weight: bold;">/</span>ST5. Make ST_Python_Logic.py executable:
<span style="color: #c20cb9; font-weight: bold;">chmod</span> +x ST_Python_Logic.pyConfigure the BitBar Output app
Now that you’ve completed the setup on your Mac, you can finish configuring the BitBar Output application on your smartphone or tablet:
1. Launch the SmartThings Classic mobile app.
2. Select the “Automation” tab.
3. Make sure the “SmartApps” tab is selected, and then tap “BitBar Output App.”
4. Tap “Select sensors/devices” and choose all the sensors you want to display as part of your Mac’s new SmartThings menu.
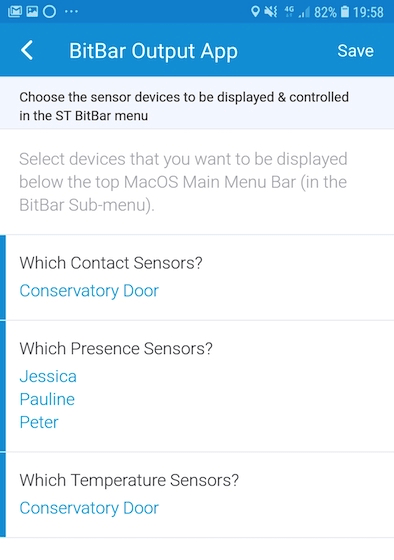
5. When you’re happy with your selection, tap “Save.”
You can also add modes, routines, and Smart Home Monitor information to your menu bar by tapping “Select display options” and then pushing one or more of the subsequent sliders into the “On” position.
All of this information will now be displayed as part of your macOS menu bar.
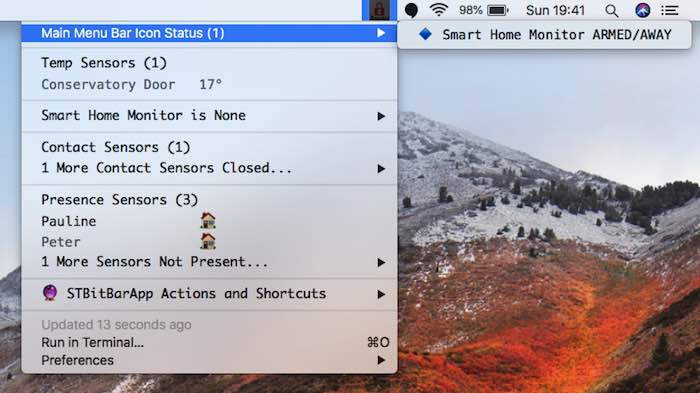
Depending on how your network is set up, you may even be able to control your sensors, run routines, and activate different modes directly from your Mac.
As you can see, it will take a while to set it up, but the end result will be worth the effort. In addition to controlling your smart home from your Mac, you can also record sensor data to Google Sheets.


