The Internet of things is becoming less and less about the Internet and more about the things. Not that long ago, IoT devices relied on a constant connection to the Internet, usually over Wi-Fi or cellular signal. The reason was there just wasn’t a whole lot of computing power onboard.
As chips become smaller and more capable, our IoT devices become smarter. This means they can handle more information on their own, only occasionally talking to devices in the cloud. Now we can harness that power.
What Is Azure IoT Edge?
The term for IoT devices that handle more computing on their own and only occasionally talk to the cloud is “edge computing.” Microsoft’s Azure IoT Edge is an IoT platform meant to help you get up and running with edge computing.
Azure IoT Edge consists of three parts: IoT Edge modules, the IoT Edge runtime, and a cloud-based interface to tie everything together. In this tutorial we’ll get you started on developing on Windows for Windows devices.
Install the Prerequisites
Before you get started, you’ll need to be running Windows 10 with update 1809 or newer or Windows Server 2019 with support for containers, as these are a key part of Azure IoT Edge. You’ll also need an Azure subscription. If you don’t yet have one, you can create an account for free.
To install the prerequisites, you’ll need to install Git. You can find the download and instructions for installation on the Git website.
Next, you’ll need the Azure IoT C SDK for Windows x64. You can install this via Git from Microsoft’s vcpkg. Run the following in PowerShell to install:
git clone https:<span style="color: pink;">//</span>github.com<span style="color: pink;">/</span>Microsoft<span style="color: pink;">/</span>vcpkg<br /><span style="color: #008080; font-weight: bold;">cd</span> vcpkg<br />.\bootstrap<span style="color: pink;">-</span>vcpkg.bat<br />.\vcpkg install azure<span style="color: pink;">-</span>iot<span style="color: pink;">-</span>sdk<span style="color: pink;">-</span>c:x64<span style="color: pink;">-</span>windows<br />.\vcpkg <span style="color: pink;">--</span>triplet x64<span style="color: pink;">-</span>windows integrate installFinally, you’ll need a container engine. The most commonly used is Docker. You can find instructions for installing Docker via its official documentation.
Install Visual Studio and Azure IoT Edge Tools
Now you’ll need to download and install Visual Studio 2019. When you install it, you’ll need to include the Azure development, Desktop development with C++, and .NET Core cross-platform development workloads.
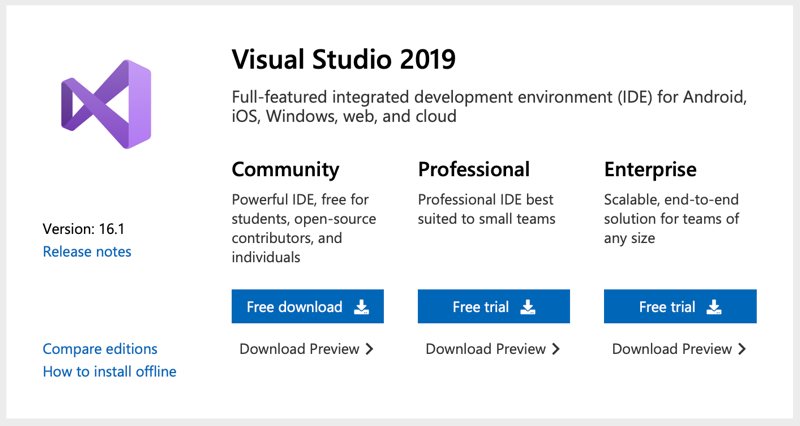
Next, download and install the Azure IoT Edge extensions for Visual Studio 2019.
Once everything is installed, there’s still a bit of setup to take care of. Open Visual Studio 2019 and select “Continue without code.” Now, under the View menu, select Cloud Explorer. Here, click on the profile icon, and sign in to your Azure account if you haven’t already.
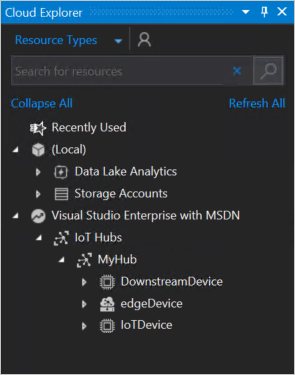
You’ll now see any Azure subscriptions you have listed. Select any you want to access via Cloud Explorer, and hit Apply. You can also see any IoT devices you may already have here under IoT Hubs.
Set Up a Container Registry
To get started pushing images to IoT devices, you’ll need to create a container registry. You can use any Docker-compatible registry, but in this case, we’ll use the Azure Container Registry.
Log into the Azure portal, then go to Create a Resource, choose Containers, and then Container Registry.
Give the registry a name, pick an Azure subscription, and choose a resource group. Microsoft recommends using a single resource group for your various tests. Then choose a location, set Admin User to Enable, and set SKU to Basic. Now select Create.
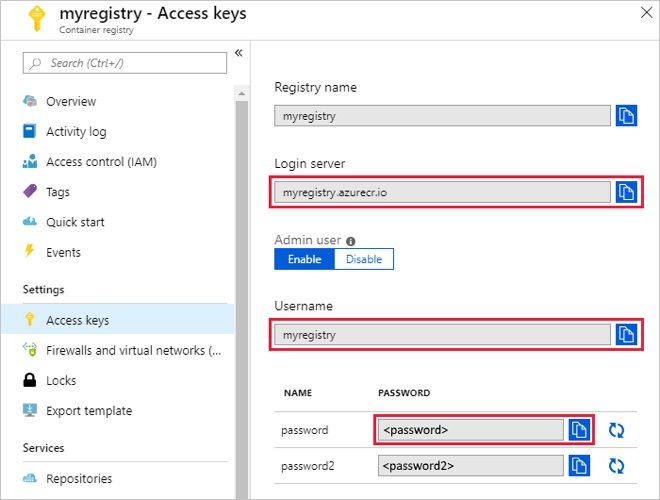
Select Access keys. You’ll want to store the Login Server, Username, and Password values in a safe, convenient space.
Where to Go From Here
Now you’re ready to start building, but the actual building itself lies ahead. This is just the beginning of your journey with Azure IoT Edge.
Fortunately, Microsoft has made a wealth of information available to help you get up and running with Azure IoT Edge and related platforms. The best place to look from here is the Azure IoT Edge official documentation. You might also want to look at the Quickstart guide for deploying code to a Windows device.
