One of the challenges of IoT is putting more intelligence in the “things” themselves and relying less on the cloud. This is called edge computing and helps devices do more on their own. These devices can connect to the Internet and sync up occasionally but don’t need a constant connection.
Amazon’s AWS Greengrass aims to help make edge computing a reality on modest hardware. You don’t need anything special, just a Raspberry Pi or three. You’ll also need to put in a little work to get everything up and running.
Before You Start
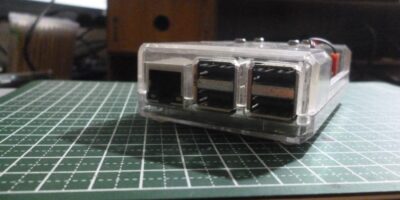
To get started with AWS Greengrass, you ideally need at least two devices. You need a Greengrass Core device that communicates with the AWS cloud, plus one or more Sensor devices. These Ssensor devices communicate with the Core but never directly with the cloud.
The Core device can be a Raspberry Pi, or it could be an Amazon EC2, for instance. The Sensor devices can also be Raspberry Pi devices.
To complete the setup you’ll need an AWS Account. If you haven’t already set one of these up, see Amazon’s documentation.
Prepare the Raspberry Pi
If you’re new to setting up a Raspberry Pi, we have an article showing you how to do just that. Install Raspbian, and you’re ready to move on with setting up AWS Greengrass.
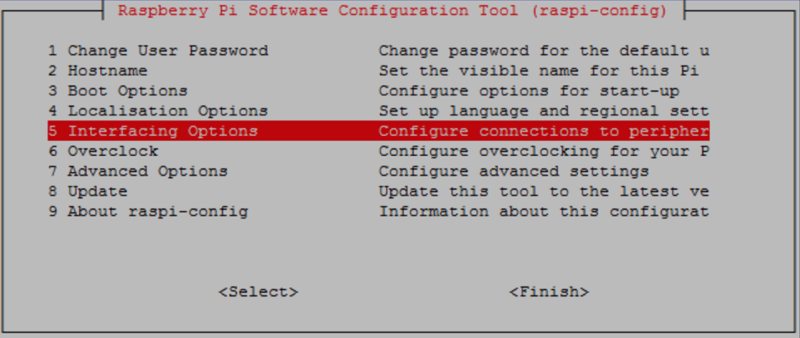
After you’ve completed the first boot of your Raspberry Pi, you’ll want to enable SSH so you can connect to it from other computers. To do this, run
<span style="color: #c20cb9; font-weight: bold;">sudo</span> raspi-configOn this screen, scroll down to Interfacing Options, then choose the P2 SSH option. You can use the Tab key to navigate the interface. Tab over to Yes, then hit Enter. Now Tab to Finish, then hit Enter. The Raspberry Pi should reboot automatically, but if it doesn’t, just run sudo reboot.
Now you’ll want to get the IP address so you can connect from another machine. To do this, run the following:
<span style="color: #c20cb9; font-weight: bold;">hostname</span> <span style="color: #660033;">-I</span>Now you can connect from another machine. On Linux and macOS you can use the built-in terminal. If you run Windows, you may want to install PuTTY. On macOS or Linux, run the following:
<span style="color: #c20cb9; font-weight: bold;">ssh</span> pi<span style="color: #000000; font-weight: bold;">@</span>YOUR-IP-ADDRESS-HEREReplace YOUR-IP-ADDRESS-HERE with the IP address you got with the hostname command above. To set up your Raspberry Pi for AWS Greengrass, you’ll need to do a few more steps. First, run the following:
<span style="color: #c20cb9; font-weight: bold;">sudo</span> adduser <span style="color: #660033;">--system</span> ggc_user<br /><span style="color: #c20cb9; font-weight: bold;">sudo</span> addgroup <span style="color: #660033;">--system</span> ggc_groupNow you’ll need to make a few changes to make the Raspberry Pi boots better with AWS Greengrass. Run the following:
<span style="color: #7a0874; font-weight: bold;">cd</span> <span style="color: #000000; font-weight: bold;">/</span>boot<span style="color: #000000; font-weight: bold;">/</span>Here, open “cmdline.txt” in the text editor of your choice. Add the following to the end of the existing line, not as its own separate line:
<span style="color: #007800;">cgroup_enable</span>=memory <span style="color: #007800;">cgroup_memory</span>=<span style="color: #000000;">1</span>Now reboot the Raspberry Pi with sudo reboot.
Finally, you’ll want to check that you’ve installed the necessary dependencies. To do this, run the following:
<span style="color: #7a0874; font-weight: bold;">cd</span> <span style="color: #000000; font-weight: bold;">/</span>home<span style="color: #000000; font-weight: bold;">/</span>pi<span style="color: #000000; font-weight: bold;">/</span>Downloads<br /><span style="color: #c20cb9; font-weight: bold;">mkdir</span> greengrass-dependency-checker-GGCv1.9.0<br /><span style="color: #7a0874; font-weight: bold;">cd</span> greengrass-dependency-checker-GGCv1.9.0<br /><span style="color: #c20cb9; font-weight: bold;">wget</span> https:<span style="color: #000000; font-weight: bold;">//</span>github.com<span style="color: #000000; font-weight: bold;">/</span>aws-samples<span style="color: #000000; font-weight: bold;">/</span>aws-greengrass-samples<span style="color: #000000; font-weight: bold;">/</span>raw<span style="color: #000000; font-weight: bold;">/</span>master<span style="color: #000000; font-weight: bold;">/</span>greengrass-dependency-checker-GGCv1.9.0.zip<br /><span style="color: #c20cb9; font-weight: bold;">unzip</span> greengrass-dependency-checker-GGCv1.9.0.zip<br /><span style="color: #c20cb9; font-weight: bold;">sudo</span> modprobe configs<br /><span style="color: #c20cb9; font-weight: bold;">sudo</span> .<span style="color: #000000; font-weight: bold;">/</span>check_ggc_dependencies <span style="color: #000000; font-weight: bold;">|</span> <span style="color: #c20cb9; font-weight: bold;">more</span>If you run into any problems, searching for the error on Google can help you locate the dependencies you need to install.
Install the Greengrass Core Software
Sign into your AWS Management Console on your computer. Open the AWS IoT Core Console and choose Greengrass. From here, choose “Create a Group.”
On the “Set up your Greengrass” group, choose “use easy creation.” Follow the processes here to name your group. Follow the steps until you get to the “Run a scripted easy Group creation” page. Here, choose “Create Group and Core.”
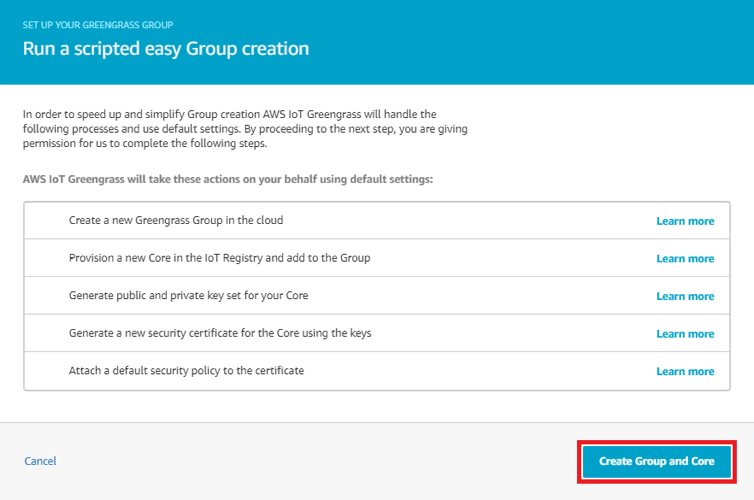
This creates an AWS IoT Greengrass group with default security properties. Now you can download the AWS IoT Greengrass Core software. Choose the ARMv7l for Raspbian package.
You can either transfer this to your Raspberry Pi on the SD card or download it from the built-in browser. Once you have the software on your Raspberry Pi, navigate to the directory that holds them. This is either the “/home/pi” or “/home/pi/Downloads/” directory.
Run the following:
<span style="color: #c20cb9; font-weight: bold;">sudo</span> <span style="color: #c20cb9; font-weight: bold;">tar</span> <span style="color: #660033;">-xzvf</span> greengrass-OS-architecture-1.9.1.tar.gz <span style="color: #660033;">-C</span> <span style="color: #000000; font-weight: bold;">/</span><br /><span style="color: #c20cb9; font-weight: bold;">sudo</span> <span style="color: #c20cb9; font-weight: bold;">tar</span> <span style="color: #660033;">-xzvf</span> hash-setup.tar.gz <span style="color: #660033;">-C</span> <span style="color: #000000; font-weight: bold;">/</span>greengrassNote that the version numbers might differ for the first command. Now you’ll want to read over the AWS IoT Core documentation about server authentication. Choose the appropriate CA certificate. If, for example, you decide on an ATS root CA certificate with an ATS endpoint, which is preferred for Greengrass, you’d run the following:
<span style="color: #7a0874; font-weight: bold;">cd</span> <span style="color: #000000; font-weight: bold;">/</span>greengrass<span style="color: #000000; font-weight: bold;">/</span>certs<span style="color: #000000; font-weight: bold;">/</span><br /><span style="color: #c20cb9; font-weight: bold;">sudo</span> <span style="color: #c20cb9; font-weight: bold;">wget</span> <span style="color: #660033;">-O</span> root.ca.pem https:<span style="color: #000000; font-weight: bold;">//</span>www.amazontrust.com<span style="color: #000000; font-weight: bold;">/</span>repository<span style="color: #000000; font-weight: bold;">/</span>AmazonRootCA1.pemNow you can start AWS Greengrass on your Raspberry Pi by running the following:
<span style="color: #7a0874; font-weight: bold;">cd</span> <span style="color: #000000; font-weight: bold;">/</span>greengrass<span style="color: #000000; font-weight: bold;">/</span>ggc<span style="color: #000000; font-weight: bold;">/</span>core<span style="color: #000000; font-weight: bold;">/</span><br /><span style="color: #c20cb9; font-weight: bold;">sudo</span> .<span style="color: #000000; font-weight: bold;">/</span>greengrassd startYou should see the message “Greengrass successfully started.”
Where to Go from Here
From here you can either set up other devices or move on to use your AWS Greengrass setup. For more information on AWS Greengrass, see Amazon’s Greengrass documentation.
For quickly setting up Sensor devices, you might be interested in Grassbian. This is a Raspberry Pi-ready Linux distribution based on Raspbian that makes setting up devices quick and easy.
