If you’ve been using Arduino IDE for a while, you would eventually need to extend its capabilities to connect with sensors, displays, Arduino shields, non-Arduino boards, and any other modules. After all, there is a limit to the number of built-in sketches you can use from the downloaded Arduino software.
However, thanks to a vibrant Arduino community, you can now access compatible programs called “libraries” which can be modified according to your needs. The following steps describe the procedure of adding Arduino libraries to the IDE.
What Is an Arduino Library?
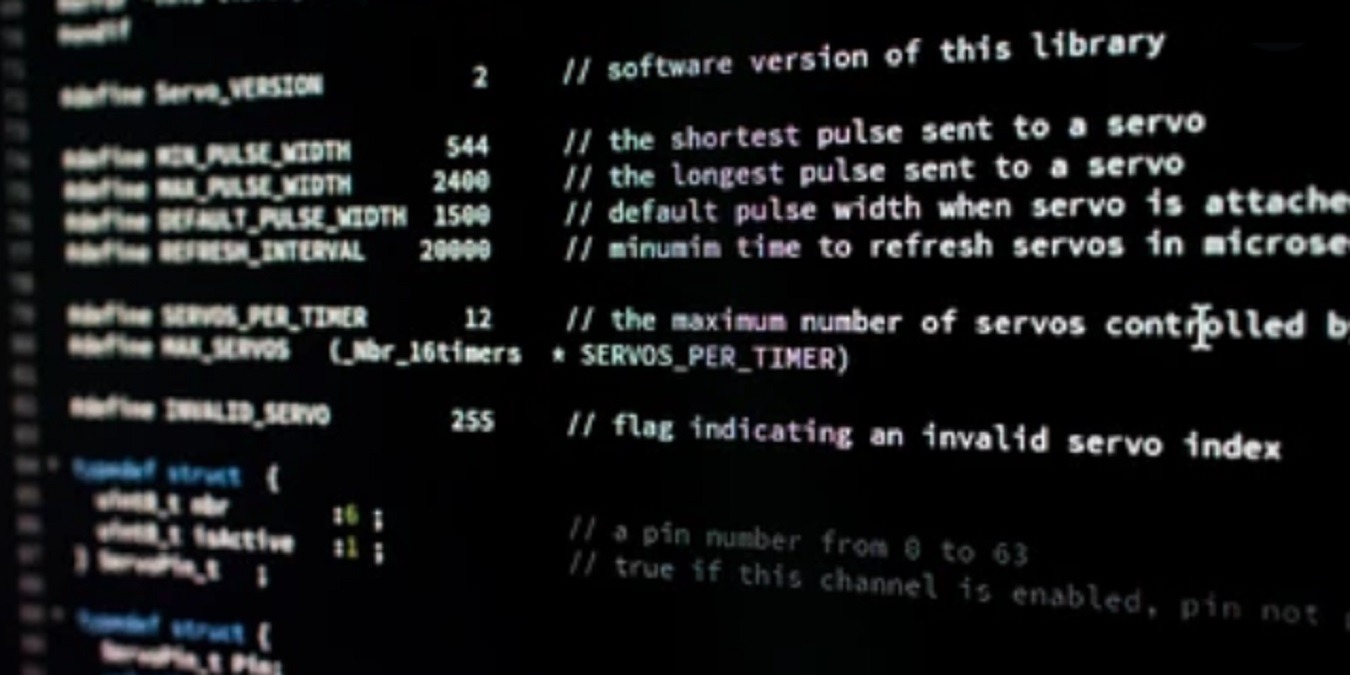
Arduino libraries are frequently-used, readily-available programs that help you get around the IDE’s limited number of built-in sketches. Arduino defines them as “collections of codes which provide extra functionality for use in sketches”. Two examples of these functionalities would be “working with any hardware” or “manipulating data” in a software.
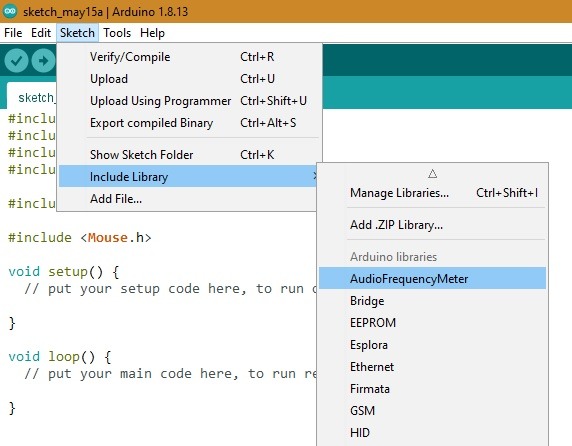
These add-on codes might be already installed in the IDE, or are downloadable separately as a zip folder on GitHub, Arduino.cc or other sites. If you’re using a stable Arduino version (as of now, 1.8.15 and below), you can easily locate the list of existing libraries. To view/add a library, go to “Sketch -> Include Library”, where you can preview a list of already installed libraries.
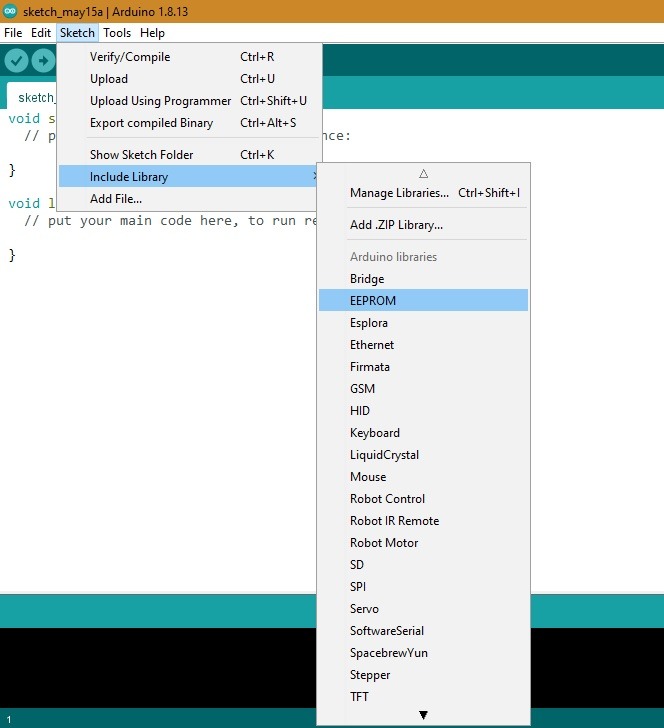
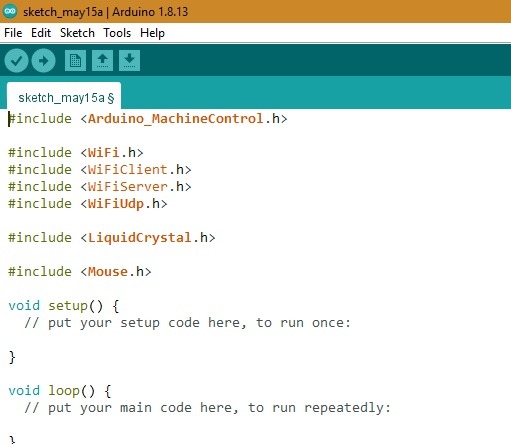
As can be seen above, all the sketch examples are neatly structured in a tree that allows easy access by topic or library. The following screen displays the addition of various libraries including that of “Mouse”, “LiquidCrystal”, and “Wi-Fi”.
All libraries are identifiable by an #insert statement at the start of the code. It is an important command that helps compile the libraries with any sketch you want to create. So, if you want to add mouse, LCD and Wi-Fi (Arduino Wi-Fi shield) functionality in your project (at the user end), the following #insert statements are in order.
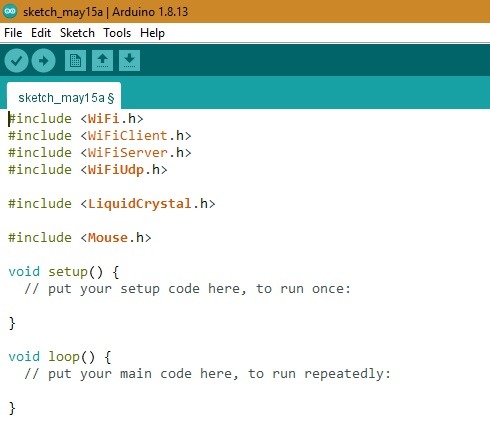
Since libraries are uploaded to the Arduino board once you finalize the sketch, they may occupy a lot of extra space. Thus it’s important to ease up on the number of #include tags, and delete any extras from the sketch if they’re not needed.
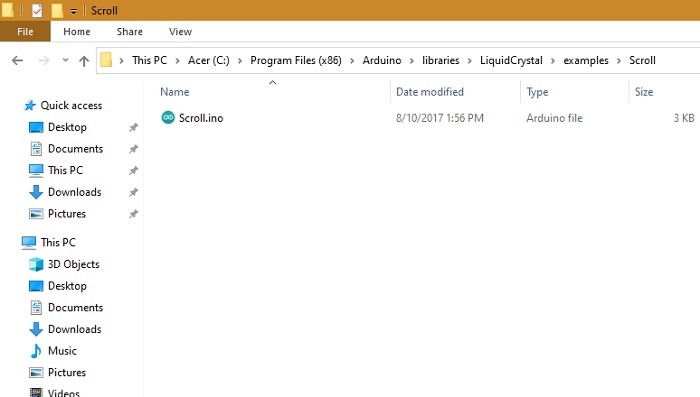
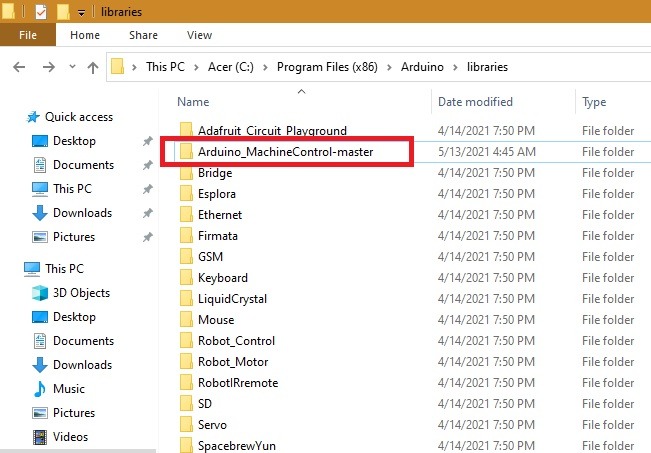
All the libraries are physically stored in the program files in .ino format, which is an Arduino sketch file. You can view each one of these .ino sketches on your computer in a relevant sub-folder under libraries, as shown here for Windows 10.
From the above menu item itself, you can access the Library Manager and import new libraries from .zip files. We have covered it separately below.
How to Install Arduino Library from Arduino Library Manager
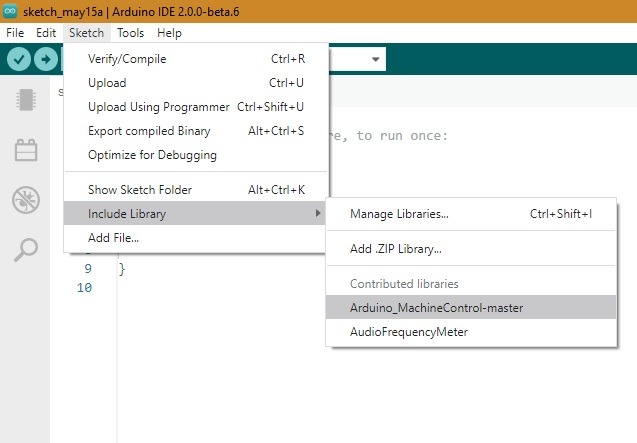
To add Arduino libraries from the IDE’s own library manager, go to “Sketch -> Include Library -> Manage Libraries.”
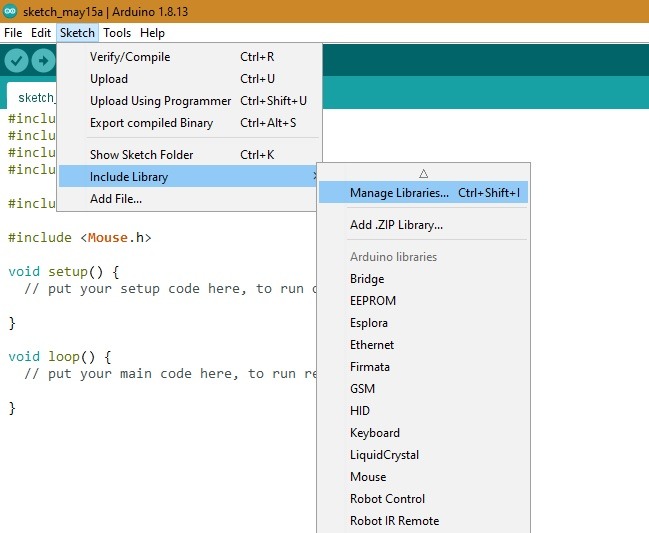
If you are using Arduino’s latest 2.0 version which is still in Beta, the procedure to add libraries is the same.
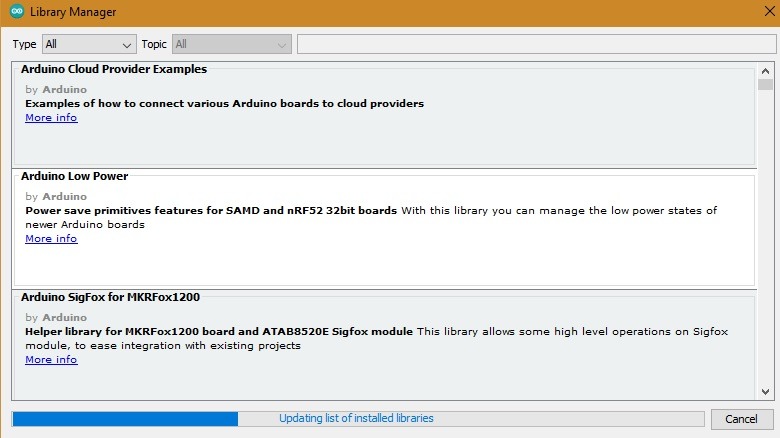
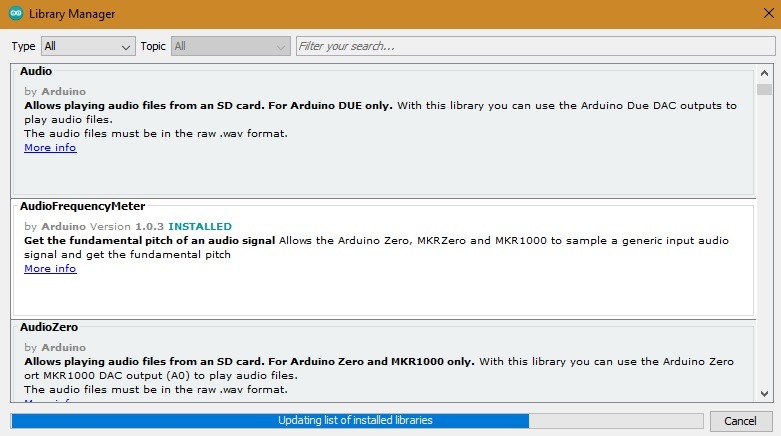
You can see a drop-down range of libraries in the Library Manager. If you previously installed a lot of sketches and themes in Arduino IDE, it might take a few seconds for the libraries to update.
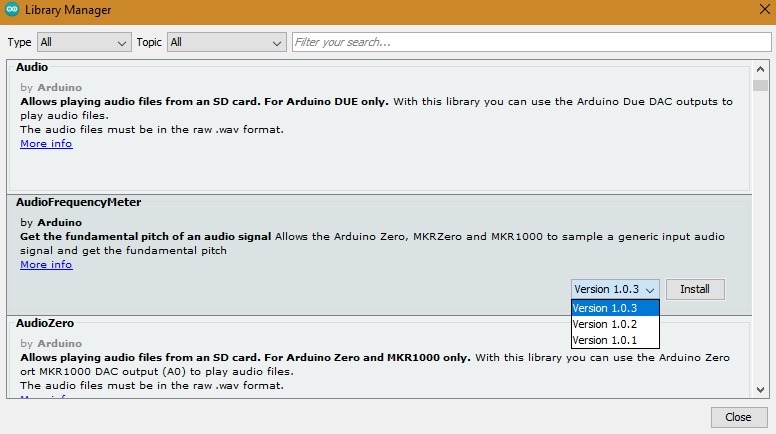
Click on any library by either searching for it or scrolling down the list. To install one of them, click “more info” and you will see multiple update versions of the concerned library along with an “install” button. Click install for any latest version available. Sometimes, only one version may be available.
The installation of the specific Arduino library should not take more than a few seconds.
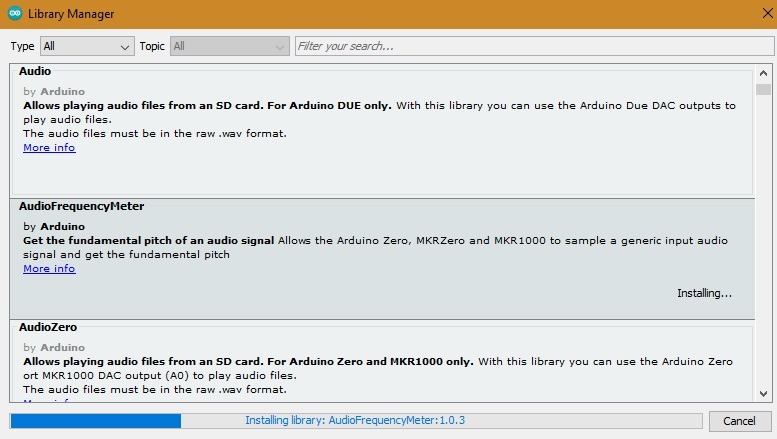
Once it has finished, an “Installed” tag can be seen next to the library in the Library Manager as shown below.
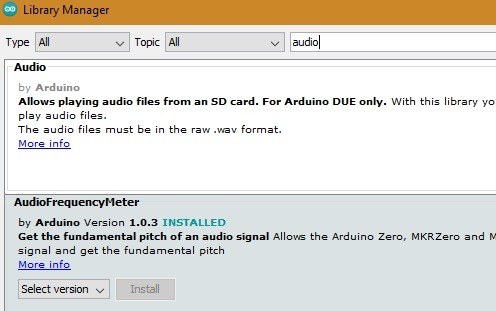
Also, wait for the Library Manager to update its list of libraries. This means henceforth, the new added library should be easily viewable from the Sketch menu. You can close the library manager once it’s done.
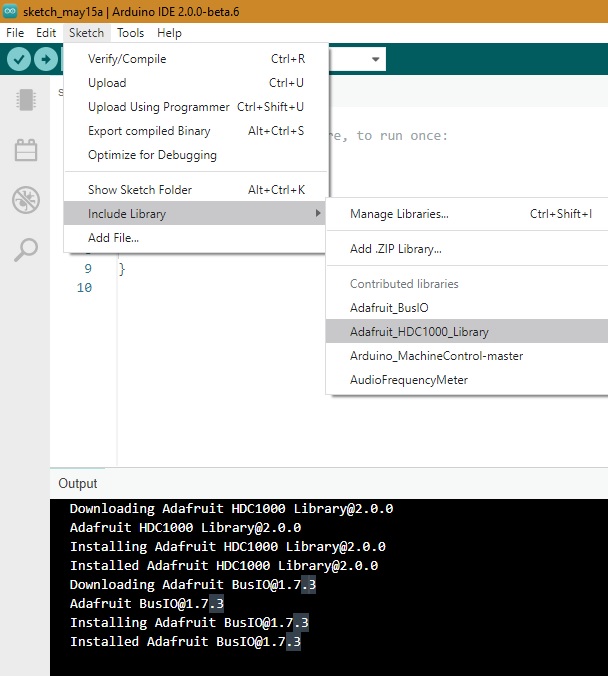
You can verify the presence of the added library by going back to “Sketch -> Include Library -> Contributed Libraries”.
If you want to add your own library to Library Manager as a .zip file, you can learn to do it in a section below.
How to Install Arduino Library in Arduino Version 2.0?
As discussed above, the procedure to install a library in Arduino Version 2.0 (Beta) is exactly the same as for 1.8.15 and older versions. However, the screenshots and placements of menus are slightly changed as shown here. For one, the library manager does not open as a popup box but on the left side.
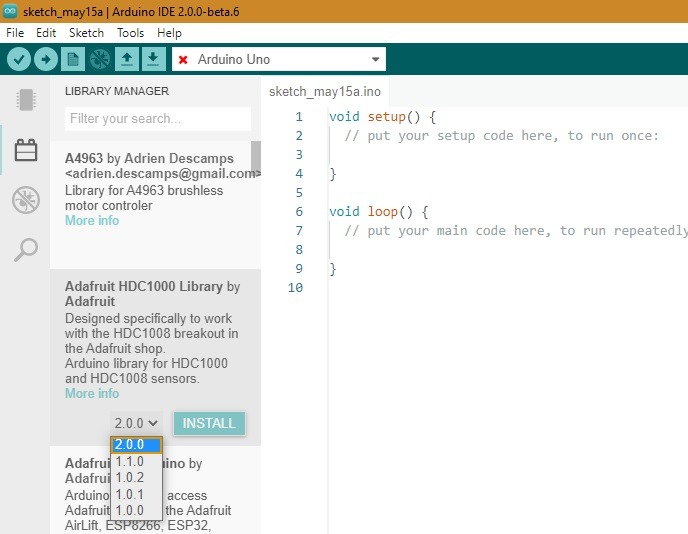
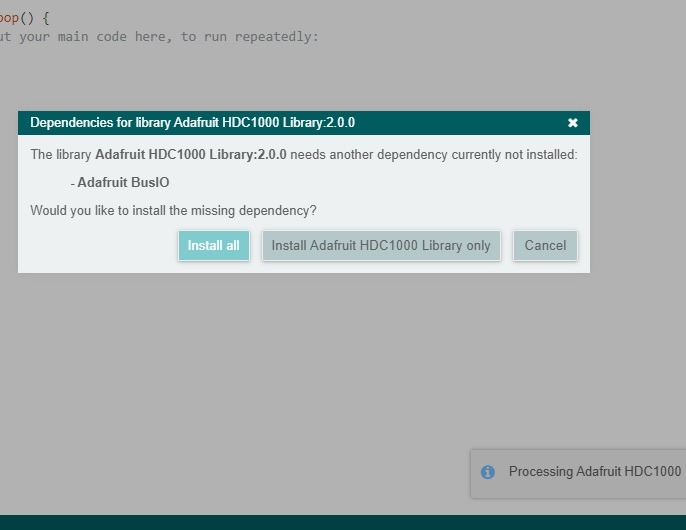
Locating and installing is pretty easy from the Arduino library menu items which can be autoscrolled as shown here. However, there may be a notification to add a few dependencies to a library. Click “Install all” to proceed.
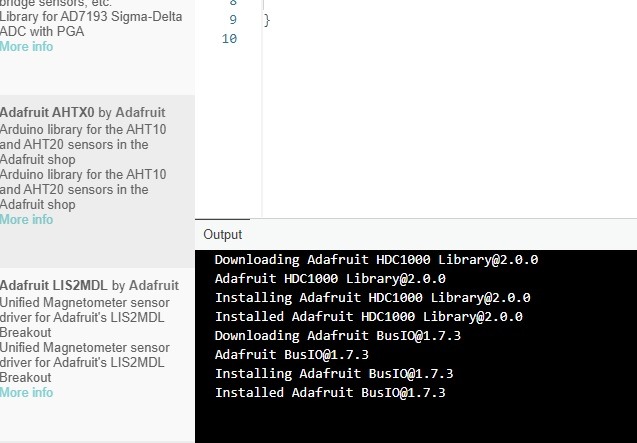
You will be able to view the installation successful message directly on the Output screen.
Accessing the newly added library in Version 2.0 is exactly the same as the previous versions, 1.8.15 and before. Go to “Include Library” in the Sketch menu.
How to Install Arduino Library by Importing a .ZIP File Automatically?
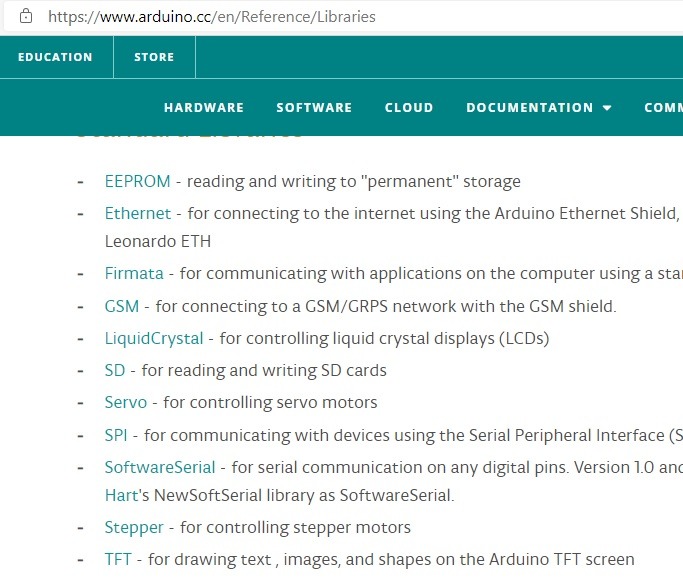
Arduino’s official website maintains a reference list of libraries that are available for download and installation. These are the ones that show up as per the above-described procedure.
If you want to add your own library, there are two options: either create one or download an existing library which has been distributed as a .ZIP folder. We will focus on the second method as it’s easier.
If you want to set up a third-party library in Arduino IDE, you have to search for it online. GitHub is a good place to find them. It has over 100 examples. We have selected the following example for Machine Control.
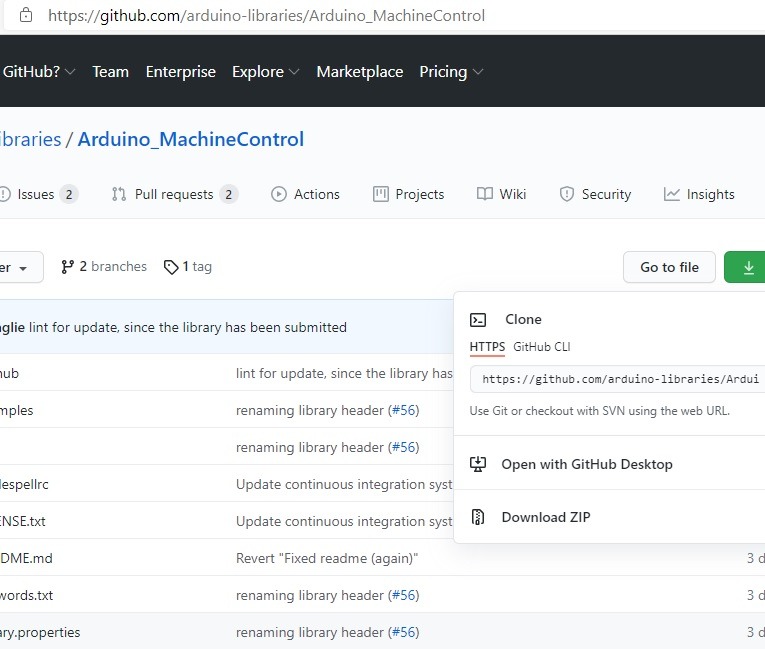
You will be given an option to download the zip file. Save it on your computer. Do not unzip it. In the next step, you can add the zip file from “Sketch -> Include Library -> Add .ZIP Library.”
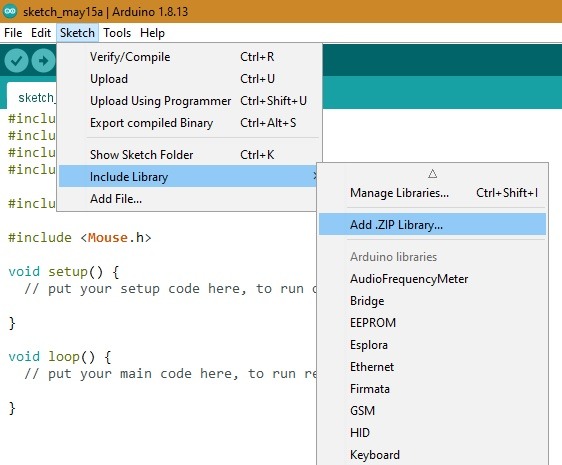
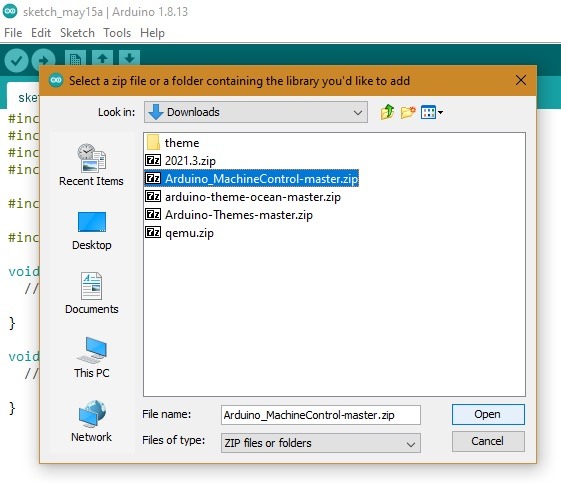
You don’t have to unzip the folder for a proper download. The ZIP file usually contains everything you need in the coding activity, including any usage examples if the author has provided them. If there are no programming errors, it will automatically sync with Arduino IDE.
Go back to the “Sketch -> Include Library” menu. You should now see the imported .ZIP file library within the list of Arduino libraries.
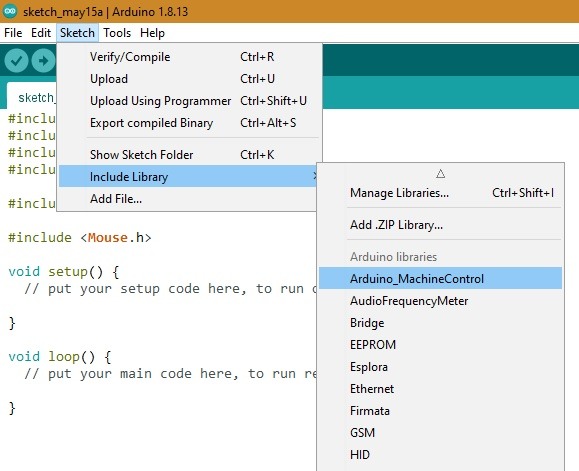
After you click on the concerned Arduino .ZIP library, the .ZIP file imported library can now be viewed in the sketch window.
How to Manually Install a Downloaded Arduino Library?
Sometimes, you may want to perform the imported library installation process manually. For this, open the .ZIP folder manually, unzip the Master template, extract the folder and save it on another location like the Desktop.
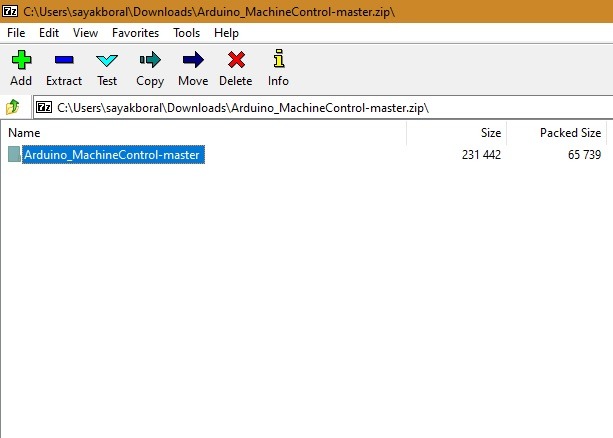
Now, close the Arduino IDE software and go to the “Libraries” folder in Arduino software location. Here, you can add the extracted Master folder as shown here.
Summary
Arduino libraries extend storage and functioning capabilities. This gives you far more room for maneuvering your projects. Whether you’re working with flight controllers, drones or robots, you can search its corresponding library file.
Now that we’ve learned how to add libraries to Arduino IDE, you might want to change new themes in the background which are colorful and more pleasing to the eye.
